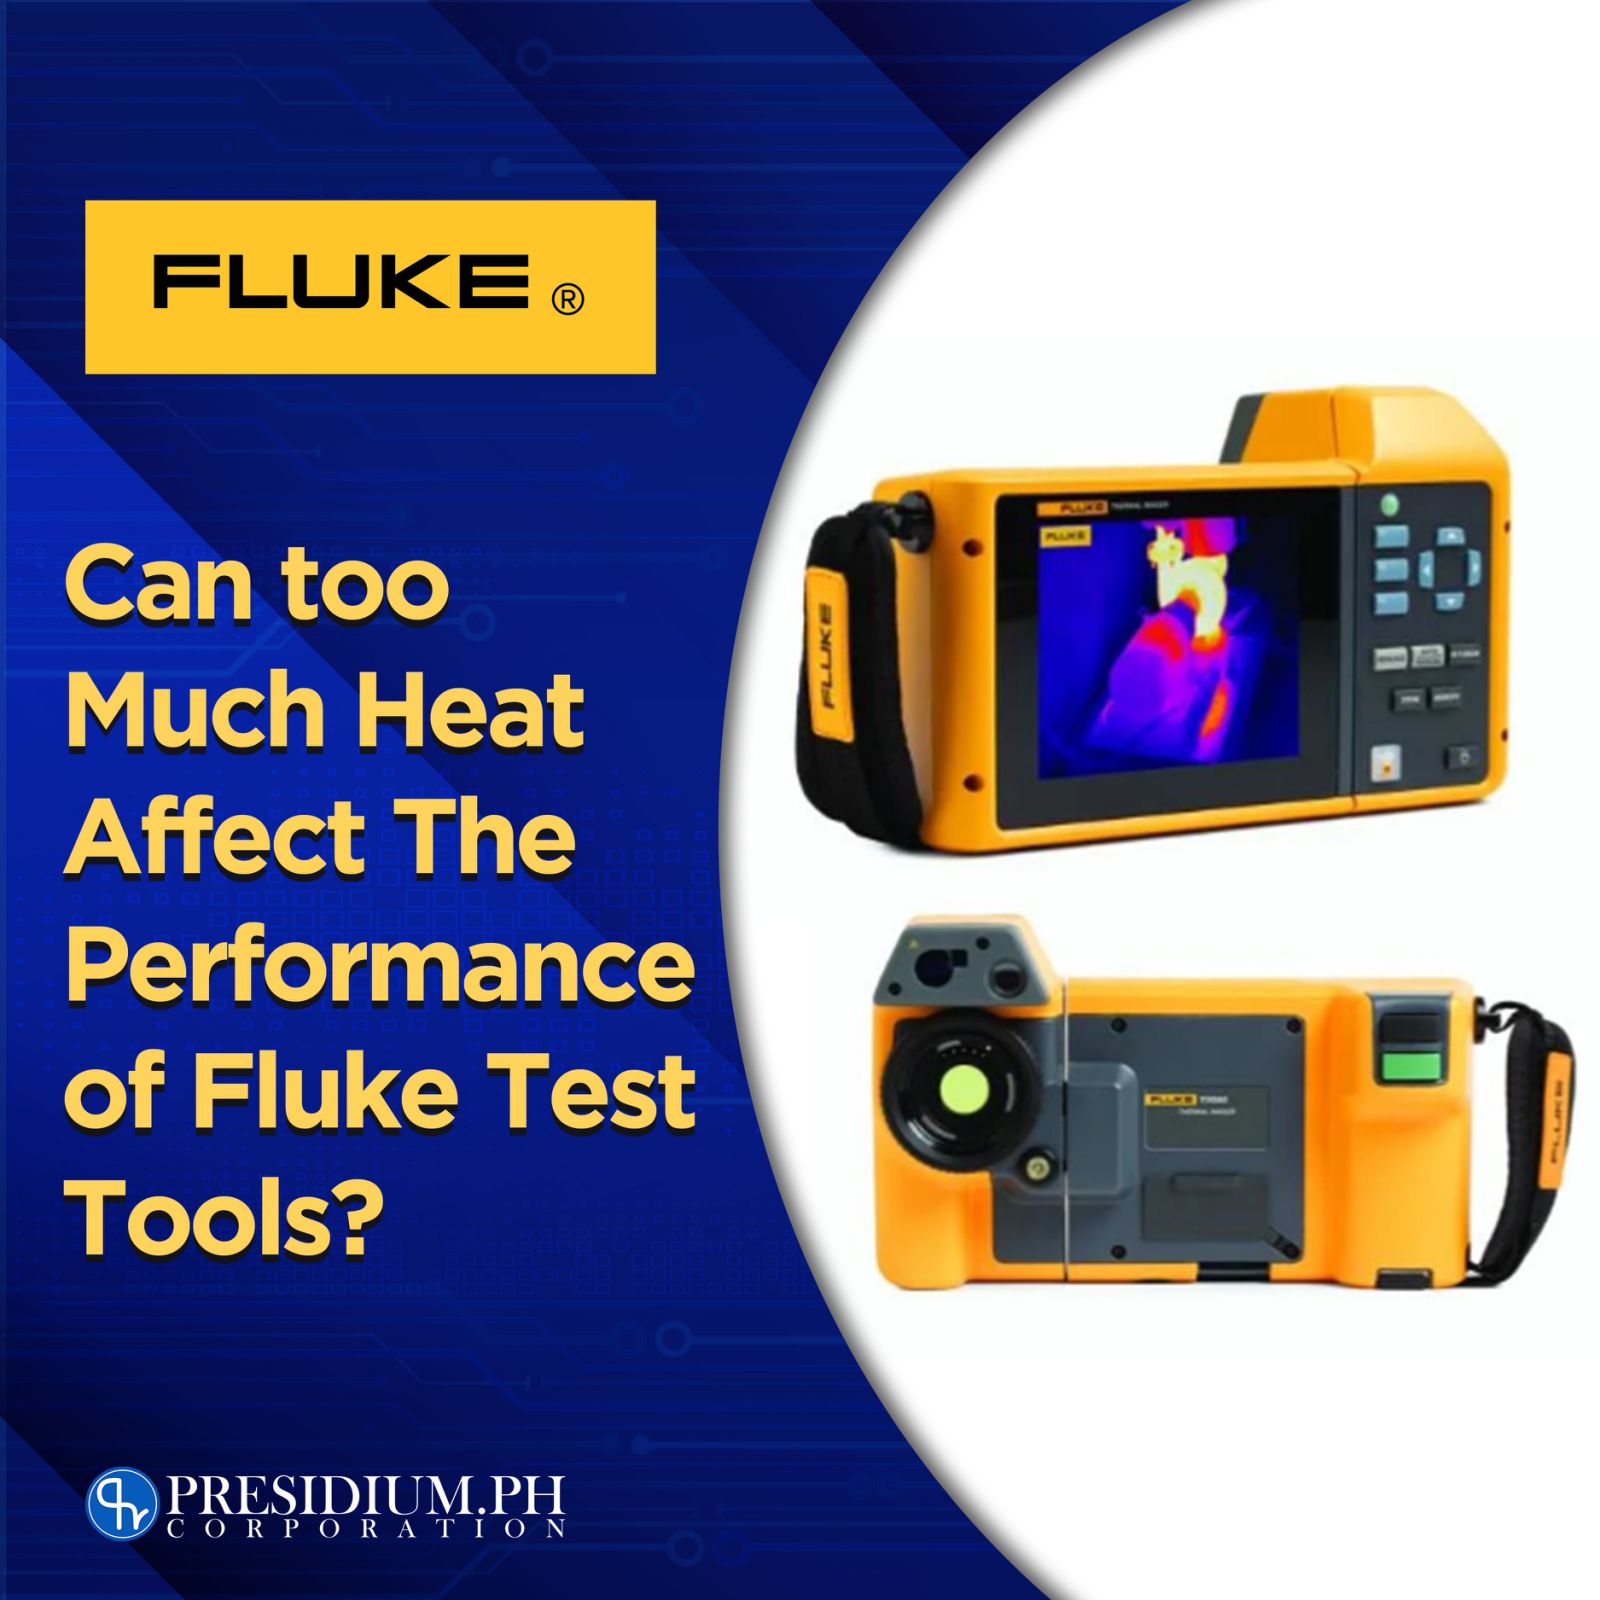
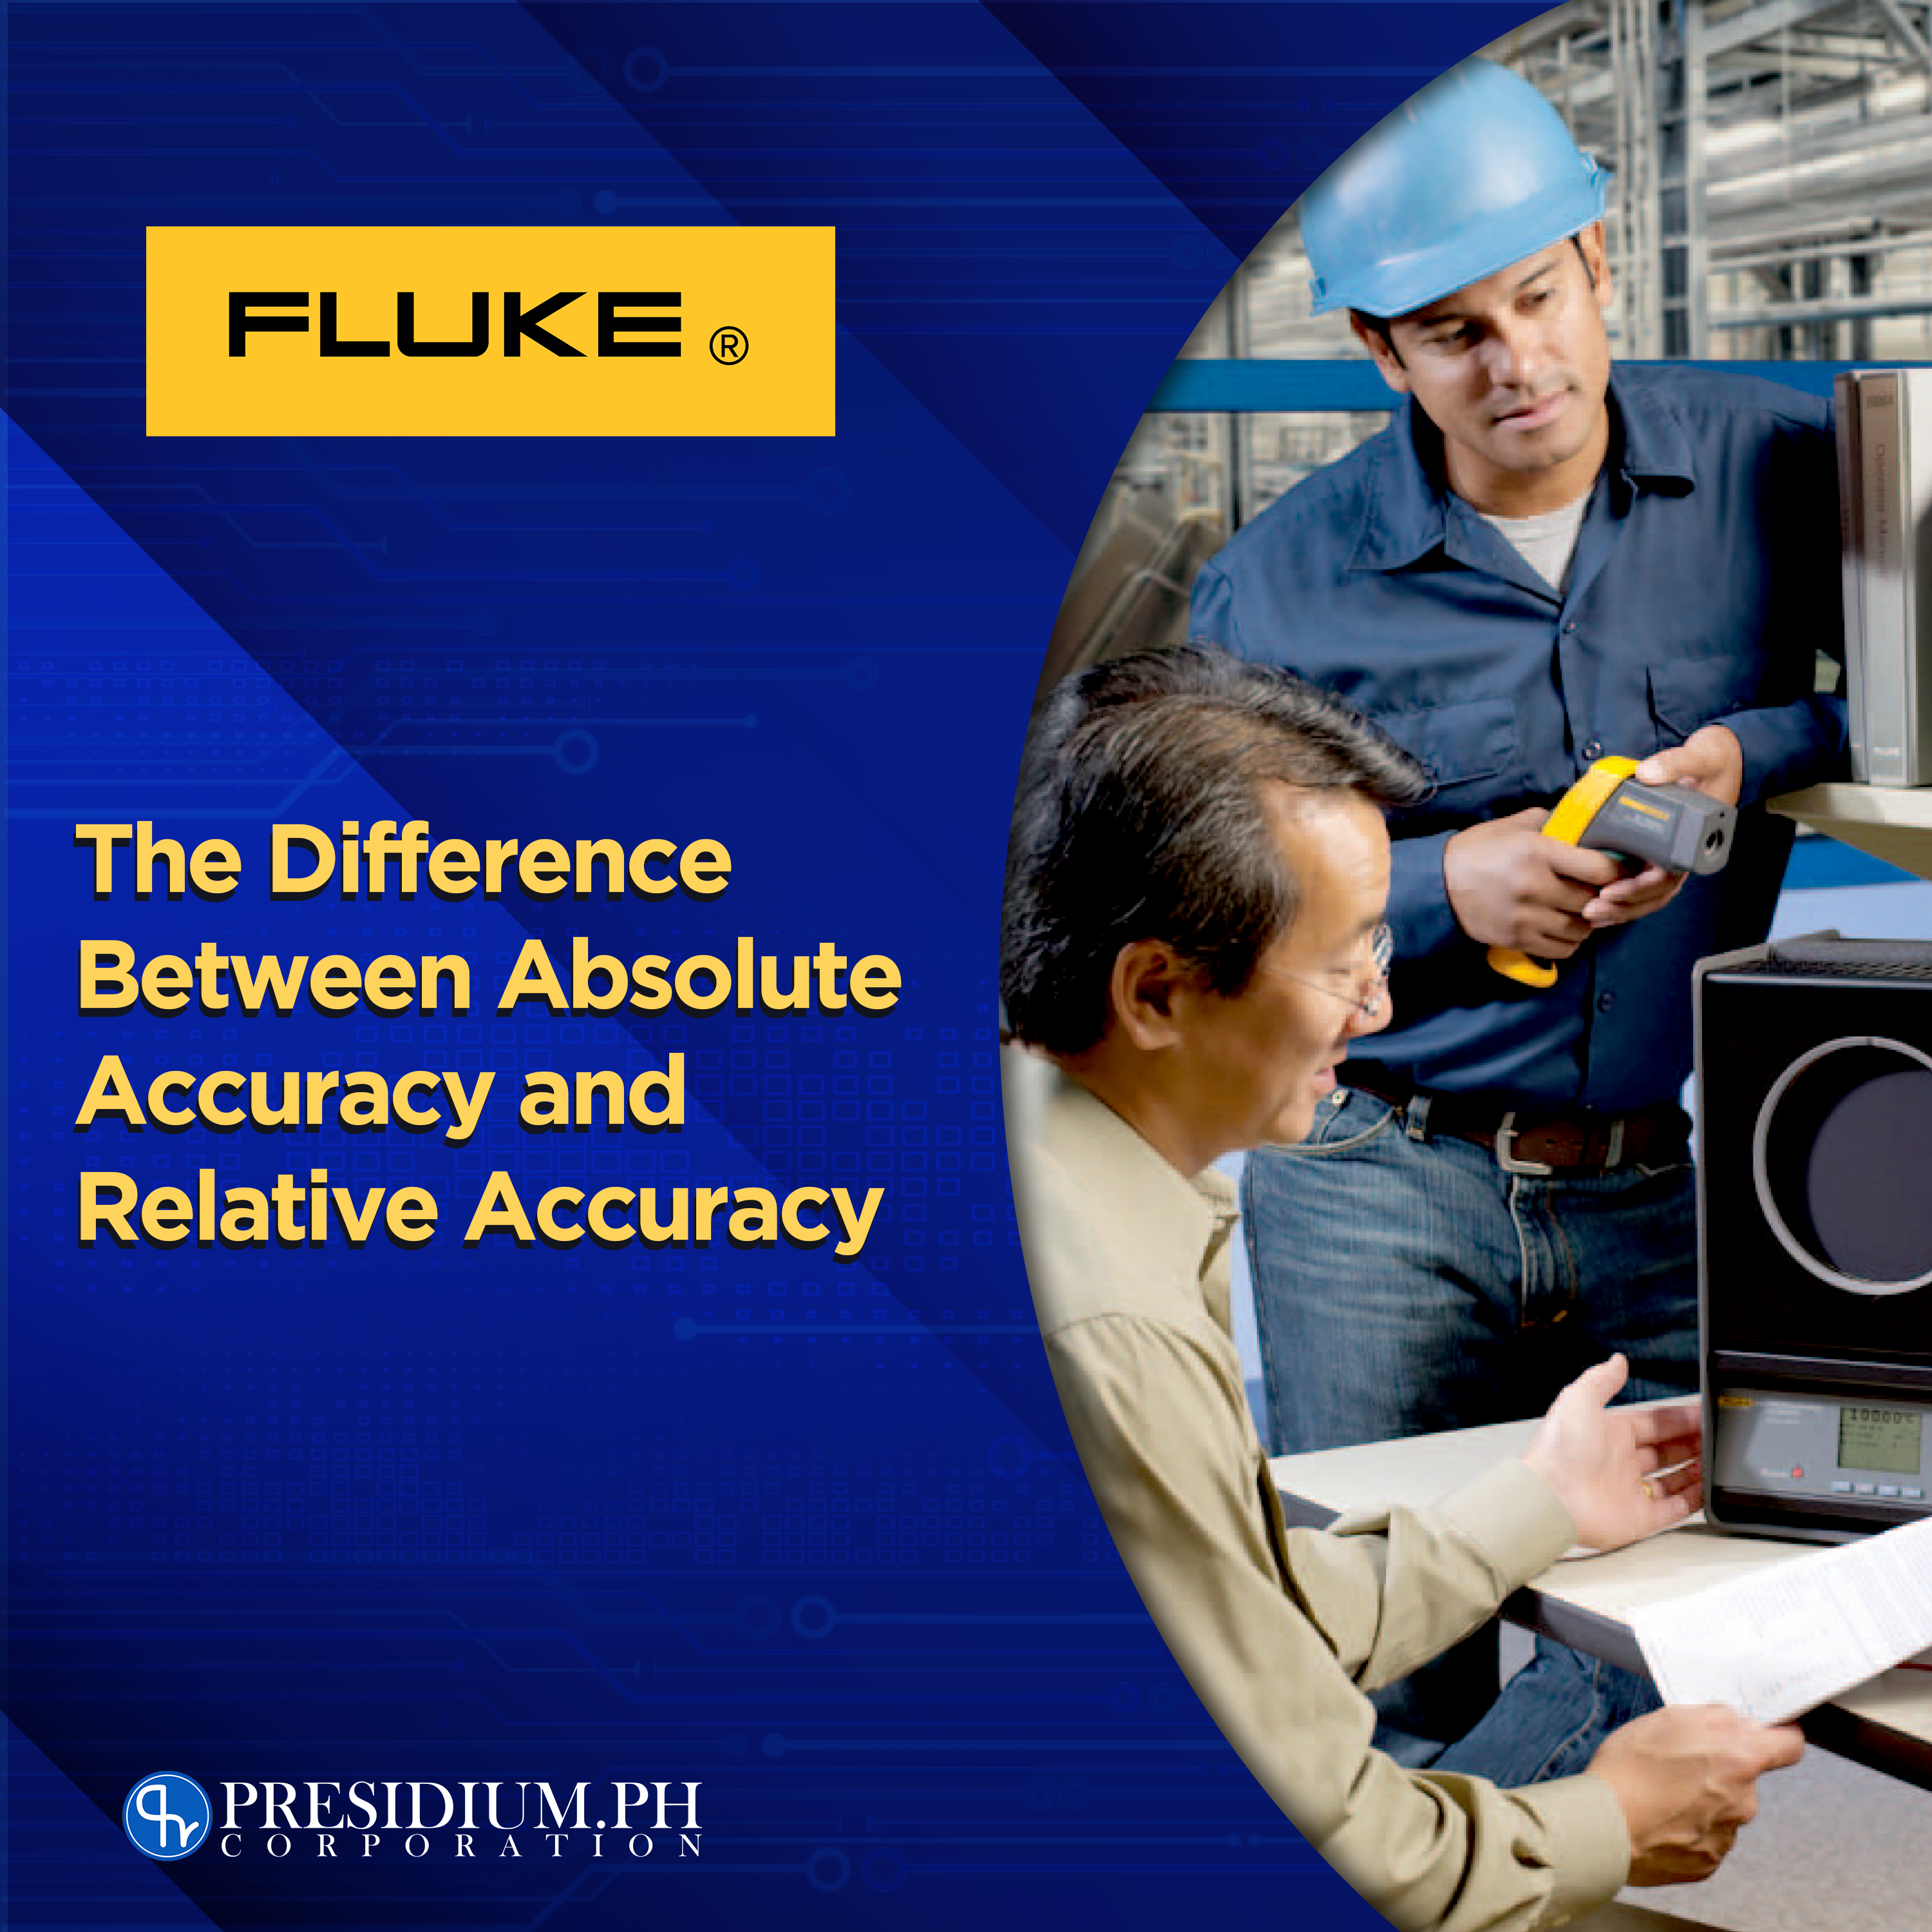
The Difference Between Absolute Accuracy and Relative Accuracy

These types of accuracy are commonly found in IR thermometers. So, when you have one, knowing the difference between absolute accuracy and relative accuracy will come in handy one way or another. So, first things first, what’s the catch between accuracy and IR thermometers? Don’t get us wrong, Fluke’s IR thermometers do not come short when it comes to performance, but rather, you would want to take note of a few extra tips to ensure accuracy in all operations using IR Thermometers.

This is applicable in different sectors.

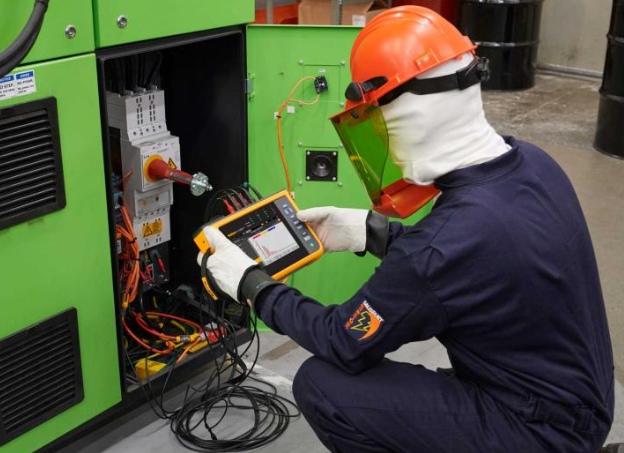
Accuracy is of vital importance when it comes to any testing and maintenance operation. IR thermometers can be used in building automobiles, electrical components, processing food, and maintaining electrical systems. Using an IR thermometer can be quite beneficial for these types of projects and proves to be a safe and effective way to accurately inspect any electrical, electronic, and mechanical work.

Trust that these are the tools that can do the job well when it comes to sensing even the most subtle temperature differences that can break any of your machines and devices. What’s amazing about them is that it also promises workers safe troubleshooting and maintenance rounds by letting you test from a safe distance. So, if you’re testing hot, hazardous, or even moving targets, you’ll have the confidence to do tests without worrying about getting injured.

The two basic types of accuracy in IR Thermometers.

There are two types of accuracy related to infrared thermometers, and that is absolute accuracy and relative accuracy. Both entail a proper understanding of the ins and outs of an IR thermometer and of course, proper calibration. However, let’s get into the deep end of each to exactly know how they work.

Both relative and absolute accuracy works together. Relative accuracy only deals with certain operations. If the temperature of the target is not in comparison to the rest of the machine this entails relative accuracy. Ideally, this takes place when you’re testing or inspecting electrical and electromechanical systems, building envelopes, and circuit boards. Let’s take circuit boards as an example. When you find that one part of the component is hot then it might be an indication of an overload. Then again, if it shows that it’s cold, then you might be dealing with a failure. See how it only affects a part of the component but not a whole?

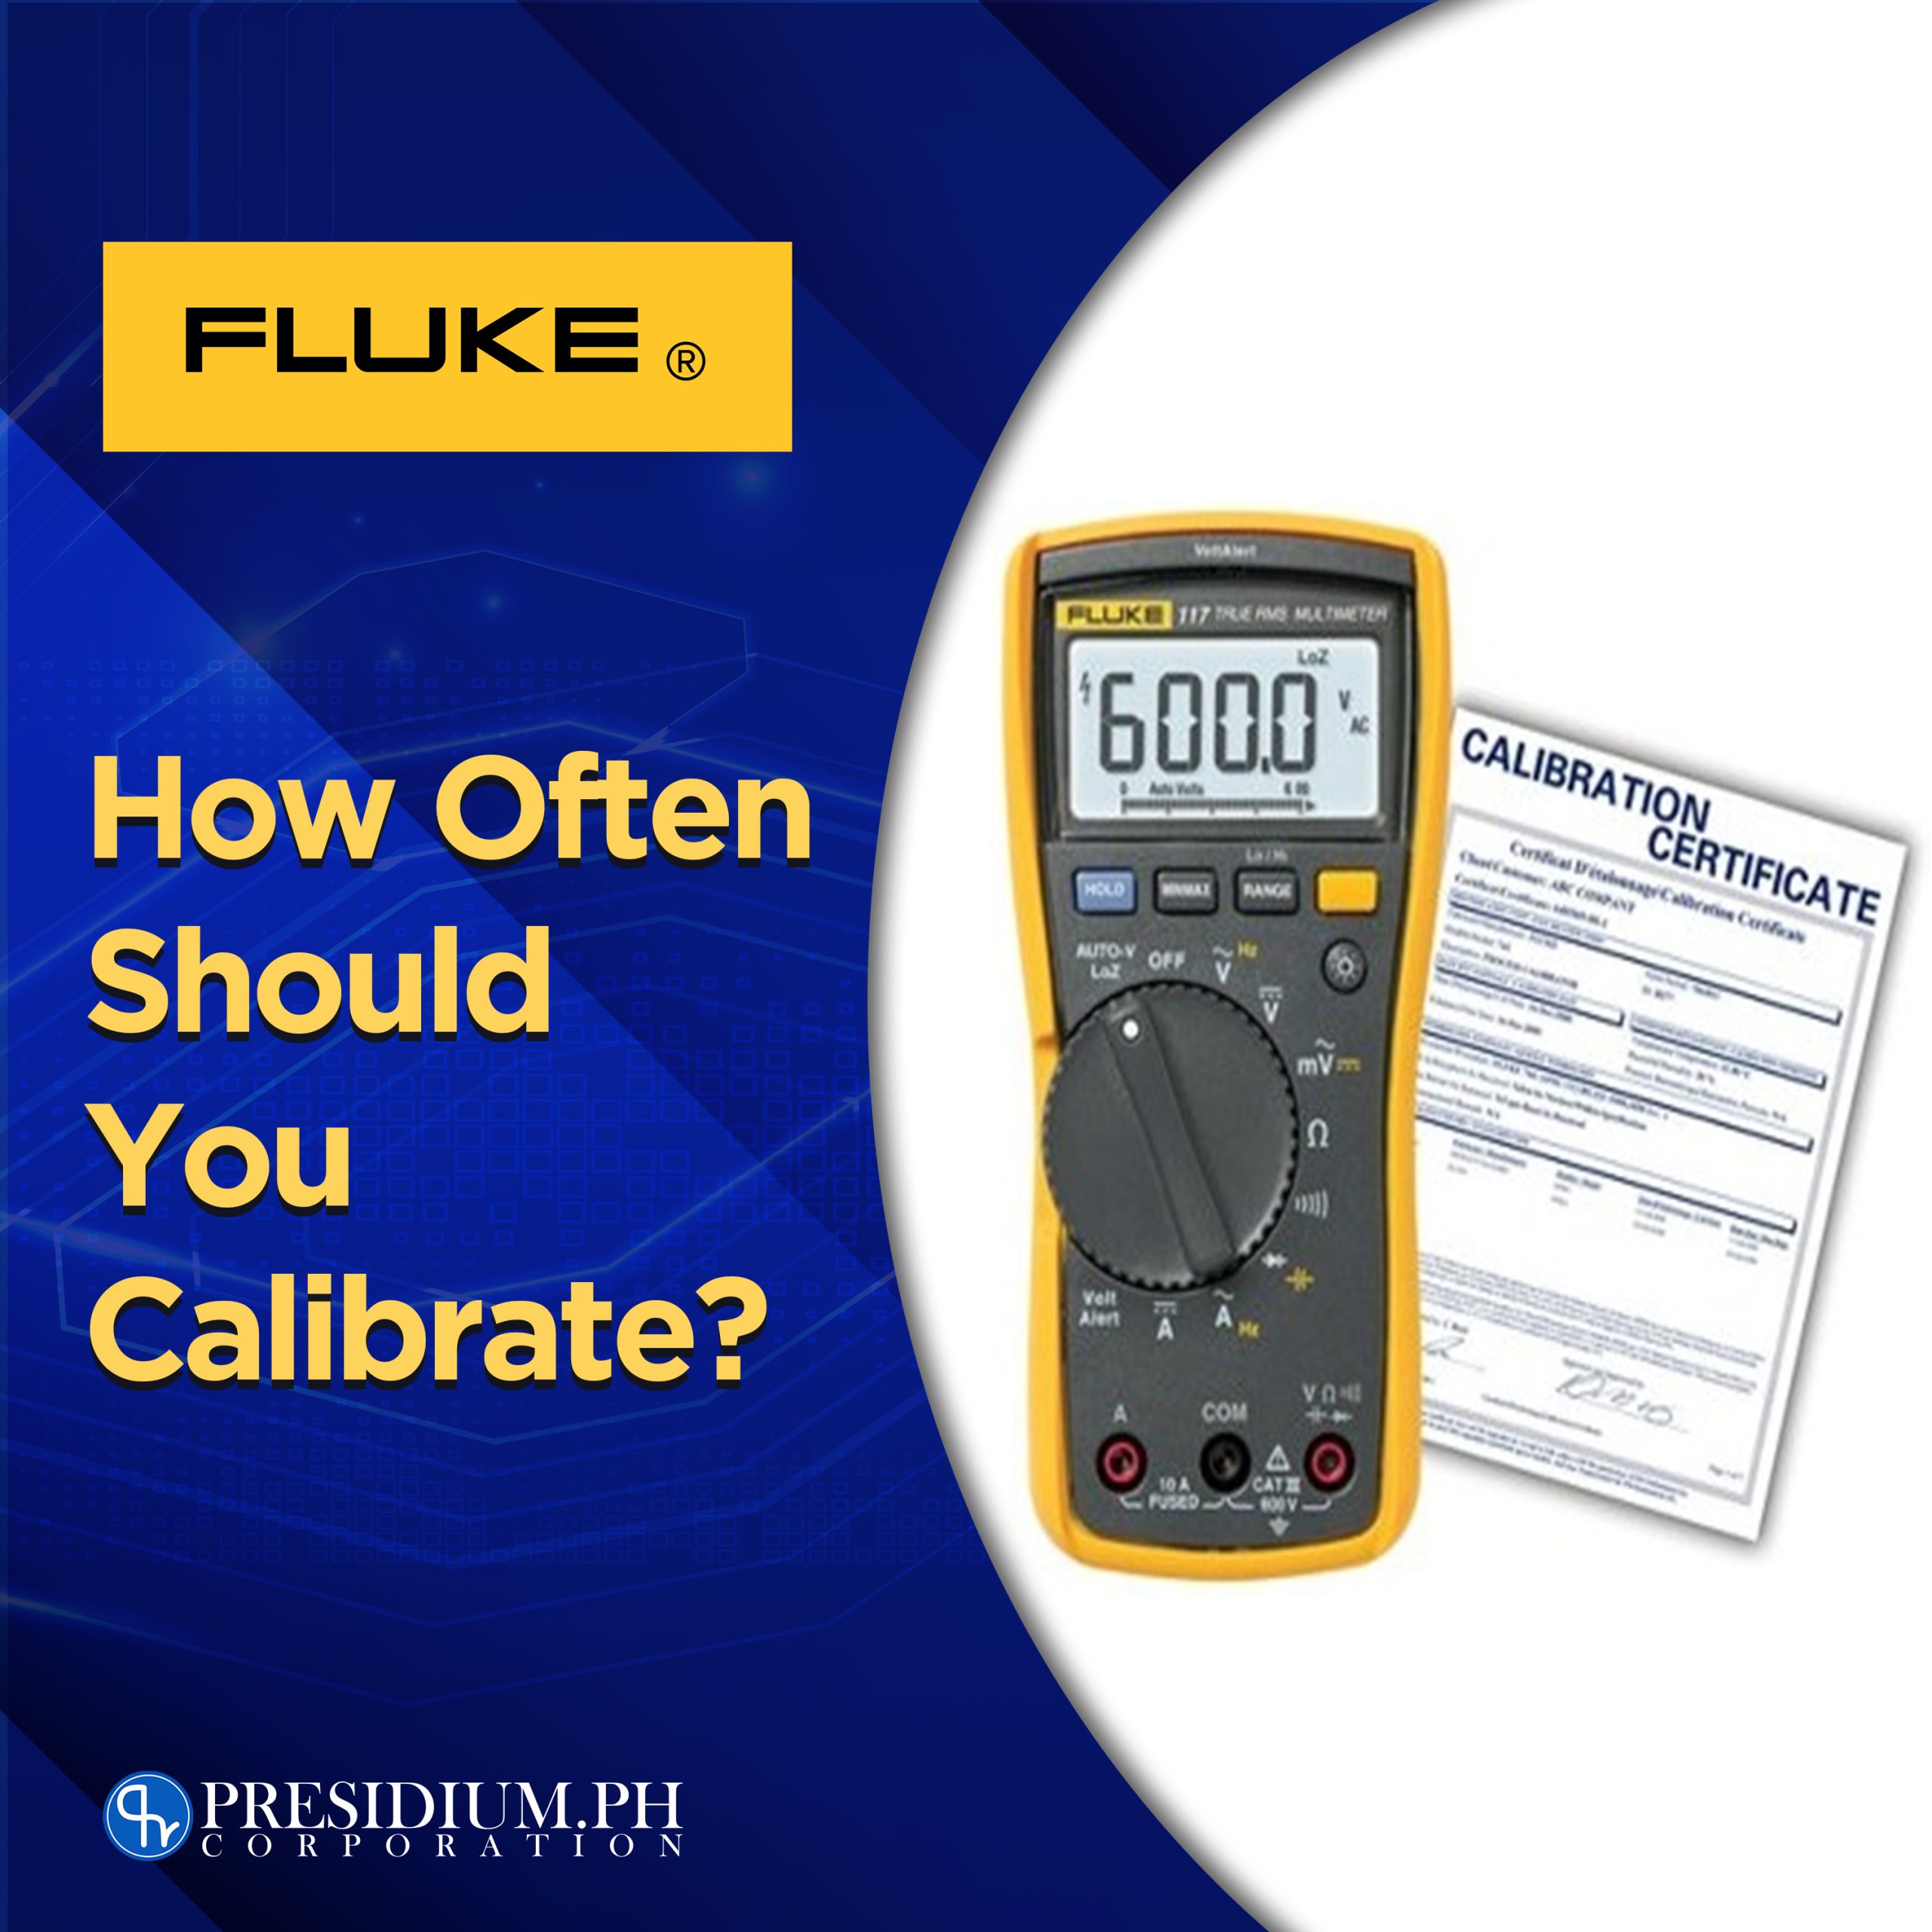
On the other hand, to achieve absolute accuracy, your tool needs to undergo proper calibration. Unlike relative accuracy, which deals with the action of testing and maintenance, absolute accuracy deals with your Fluke tool’s performance and how well it can produce results. Of course, there are certain precautions for you to get it right, but nonetheless, without proper and daily calibration, your IR thermometer might not produce on-point results.

Remember, that Fluke tools are also prone to deterioration and depending on how you care for them, they also have the tendency to decrease in performance which is why calibration is very important for Fluke tools.

Get your Fluke tools through an authentic source!

Hey, you made it to the bottom! Are you currently looking for the best-performing test tools in the market to run daily maintenance checks on your machines? You’re in luck cause Presidium PH is an authorized distributor of Fluke test tools in the Philippines. Prevent these faults from penetrating your machine by using the best test tools there are!

If you want to know more about Fluke tools and their functions, visit our website for more info! This is a one-stop-shop for the best test tools within Metro Manila.

Read more

4 Common Electrical Grounding Mistakes

Upright grounding is more than a safety feature. In fact, it safeguards tools, equipment, and other devices that are supplied in the facility. Therefore, effective grounding procedures must take place in every part of a project and must never be overlooked. With the absence of proper grounding systems, you might be able to expose yourself to the risk of electric shock and instrument errors. However, at times, there are grounding errors that cannot be assisted. Here, we will be able to discuss the five common electrical grounding mistakes that some people make.

Why test ground systems?

Soils do not stay the same over time. Corrosive soils, high moisture content, salt, content, and elevated temperatures, can decrease the quality of your soil. In a natural setting, this might be okay for backyard gardens. However, if you are building extremely sensitive projects on top of it, you might want to double-check if the soil is compatible with the proper standards.

According to an official Fluke source, faulty ground systems will omit electrical problems that will result in unwanted downtimes. The root causes. Poor grounding and poor power quality.

The common electrical grounding mistakes…

There are different projects that require proper grounding. One can differ from the other, but one thing rings true, and that is never to forget proper grounding.

1 Do understand soil resistivity.

The number one of a grounding system is to provide a low impedance route to the earth. Going back, soil resistivity plays a significant role in the process since it is the main basis of any grounding system. It relates to a lot of functions including soil type, moisture content, and temperatures. These kinds of characteristics pave the way for ground impedances.

Take note that the current will likely follow through a path of low resistance rather than a high one. High soil resistance will result in unsafe paths that will eventually increase equipment failures and human injuries.

2 Failing to measure the grounding system.

One thing you need to check is the grounding systems if there are any vacancies. Make sure that there are none so to speak of. A variance may occur over time that was not intended for. As an example, if a ground rod hits a large rock and it does not reach the depth that it’s required to be at this may cause complications.

3 Always reattach ground paths.

In such instances that you must relocate, replace, or remove equipment for repairs, it is of utmost importance that you reconnect the entire path completely. Technically, all connection in the ground path includes setscrews, locknuts, and threads. You should fully evaluate the continuity before putting them back into the system.

Also, it is probably best for you to check for any corrosion, rust, and dirt since impurities can contaminate metal raceways.

4 Using ground wire incorrectly

Pay attention to the conductor’s bends and lengths! Ground wires that are bundled up together can create high impedance and this will give way to higher voltages on the equipment during transient events. Also, refrain from coiling the wires since this will prevent the current to go through a straight and simple path.

Standards for ground testing…

Not sure if you are meeting the standard for grounding? Here’s something to guide you along the way! These organizations provide recommendations and/or develop standards for grounding to ensure safety.

Remember, the goal of these grounding standards is to help you ensure the reliability of your equipment in such cases that faulty currents occur.

Purchase from an authentic source!

Hey, you made it to the bottom! Be sure to check out Fluke Earth Ground Testers through our official site! Are you currently looking for the best-performing test tools in the market to run daily maintenance checks on your machines? You are in luck cause Presidium PH is an authorized distributor of Fluke test tools in the Philippines.

If you want to know more about Fluke tools and their functions, visit our website for more info! This is a one-stop-shop for the best test tools within Metro Manila.

https://presidium.ph/shop/?wlfilter=1&product_cat=fluke-earth-ground-testers
Read more

Can Too Much Heat Affect the Performance of Fluke Test Tools?

The simple answer to this is yes, it does. Fluke test tools no matter how high performing they are, are still susceptible to a decrease in performance if there is too much heat involved. But in all fairness, it’s not just for Fluke tools, heat is a long-time enemy of electronics in all forms and variations. Therefore, most gadgets are preferred to be stored in cooler places. However, this may pose are a difficult task for those who are residing in tropical countries, or in places that are constantly under immeasurable heat.

How can heat cause electronics to lessen in performance?

Precisely, electronics are at their best performance when they are used in lower temperatures compared to high ones. In such cases that you expose your tools regularly to high heat temperatures, expect that your tools may decrease in life and may no longer be as reliable as it once was.

Also, if your tool is always under heat, don’t be surprised if it suddenly begins to break down or malfunction. Remember, allowing devices to run for long periods of time at high temperatures will provoke your tools to be less functional.

How does a Fluke tool perform when under extreme heat?

We’ll give you an idea. According to MasterFlex, a civilian employee in Iraq, Robert Kirkman who is regularly using a digital multimeter under the harsh heat of the desert sun has experienced malfunctions with his DMM because of the heat. He says that the screen turns black regularly. He quoted “So far, the meters have recovered after several hours in air conditioning, but this causes a severe inconvenience when troubleshooting equipment. I am using the tools to work on power generation equipment, power distribution and environmental control systems.” Technically the systems that he’s trying to troubleshoot are HVAC systems to keep soldiers cool.

Although he was a bit beaten down with the device’s performance, he clarified that it’s not the Fluke test tool’s fault. He has been using the brand for nearly 30 years and is quite content with its performance. He clarified saying, “This environment is very extreme and most equipment we use was not designed for it.” Therefore, it’s not just zeroing out with one tool, heat has the tendency to really decrease the performance of every electronic, especially in extreme conditions.

Ideal operating temperatures.

Not too hot and not too cold is the most ideal room temperature for your tool to work with. This will be approximately 50 degrees F to 82 degrees. But let’s not put our focus too much on hot and cold temperatures. There are other factors that can also contribute to the performance of your Fluke test tool. 

Humidity also gets a hand in your tools’ performance. Excessive humidity or extreme dryness. This kind of environment can cause errant discharges and can trigger condensation and water which is not preferred for your tools.

Managing heat with electronics.

But worry not, there are a lot of ways how you can keep your test tools cool in the blazing summer heat. According to the Institute for Advanced Study, there are five easy ways for you to manage heat when your electronics are in use, especially those that are quick to overheat.

  1. Allowing airflow. Don’t keep your tools compressed with thick and heavy materials. Allow a 2–3-inch space around them to let air cool heater areas or spots. Gear free from obstructions that are not granting your device any airflow.
  1. When not in use, stay away from heat. Therefore, don’t just leave your tools lying around under the sun. Remember, no matter how reliable and rugged a Fluke tool can be, it will work well when it’s in a calm and cool environment rather than being left alone in heated places.
  1. Stacking is a no-no. Electronics can get hot on their own. To help manage the heat around your device, prevent them from making heat on their own. So, it’s better to lay them all separately.
  1. Keep it clean! Okay, this is more of maintenance advice rather than heat advice. But nevertheless, it does help it cool down. Just don’t wipe it with hot liquid of course!
  1. If your tool overheats, shut it down! Let it sit and cool down before using it again. And remember, allow a lot of airflows so that your tool doesn’t continuously overheat.

Get your test tools through an authentic source!

Rest assured that through proper measurement, you can achieve the best PV solutions for your establishment, homes, facilities, and businesses. So, if you’re currently looking for the best-performing test tools in the market to run daily maintenance checks on your machines, you’re in luck cause Presidium PH is an authorized distributor of Fluke test tools in the Philippines. Prevent these faults from penetrating your machine by using the best test tools there are!

If you want to know more about Fluke tools and their functions, visit our website for more info! This is a one-stop shop for the best test tools within Metro Manila.

Read more

Smart Ways to Save Energy and Prevent Downtime

Fluke is a powerhouse tool that can see, hear, and detect all kinds of electricity-related health situations. And that is only one out of a hundred reasons why it is favored by maintenance men and women all over the world. But Fluke tools can only do so much when people get a bit dismissive about caring for their electronics and electricity in general. Therefore energy-saving has become a smart practice for most households, buildings, and facilities. Today, we’ll teach you how to save energy using the most profound test tools in the industry – Fluke test tools.

Moreover, considering downtimes, electricity usage, when abused, can cause downtime. Like all things electronic, they are also prone to wear and faults with excessive use. Therefore adopting healthy practices is always preferable when consuming energy on a daily basis.

Importance of saving energy.

So, when we’re talking about how to save energy, we are not just singling out completely avoiding its use, but rather, we want to introduce smart ways on how you can do it. Energy-saving is a strategy that can completely help the environment, but other than that, it also comes in handy in preventing downtime incidents, abusing your electronics, and inducing excessive use of them.

Take facilities for example. It’s a given fact that most facilities take up loads of energy. And what most people might think is a natural thing that they no longer need to save energy, is a huge misconception. Energy takes up money, and when the electric bills pile up, most managers tend to have a double-take. Remember, we are no longer living in the last decade, this is the 21st century, and prices are hiked up. A quick solution? Have your equipment and machines evaluated and measured. You will never know, one machine might already be causing havoc in a way that is affecting your electric bills, the surrounding environment, and the people working close to it.

To this day, electricity and its availability are almost infinite which is why monitoring, measuring, and testing take a huge significance in establishments. Therefore, we need to consume energy in the most conducive way. In all honesty, electricity and how it is important to our day-to-day tasks can make or break productivity. That’s why, with proper monitoring, we are also at the same time, caring for our businesses or our homes.

Why measurement is relevant to save energy…

In all fairness, measurement is crucial in every point of work to know where you needed to align, adjust, and most of all make strategic decisions to meet goals. This is like our current topic. To save energy, you need to know how much energy is being wasted, you need to gauge if the equipment and machines are the ones that are causing them, and you also need to know which ones need immediate solutions.

Above else, data and logging still reign supreme in businesses, in maintenance, and in a lot of aspects that entail work. You need to measure how much energy you are taking up and see if the numbers are still aligning. This will allow you to document energy waste and machine faults. This information plays a crucial part for future reference.

Ways to save energy…

One of the very known characteristics of Fluke tools is its ability to promote energy-saving, and electronic care, and to give solid solutions to maintenance problems concerning electric machines. The very first thing you want to know when you are saving energy is the health of your electric machines and the overall power that holds them.

And with the help of Fluke tools, this is now achievable in quick and efficient ways. You see, when your electronics are spilling out energy everywhere without you knowing, then your energy-saving methods might be all for naught. This is something you want to check up on daily, especially if you are consuming them every day. So, here are things to keep in mind, on ways to save energy.

1 Mind your bulbs! They can be beneficial to save energy

If you are working in a huge facility, using traditional incandescent lightbulbs can consume excessive amounts of electricity. Try using halogen incandescent bulbs and compact fluorescent lights. Also, take note that fluorescent lights can also have faults. Therefore, it is also preferred for you to use a Fluke Fluorescent Light Tester for easier detection of underlying faults.

2 Turning off lights or appliances to save energy

The simplest and easiest way to save energy is to unplug them when not in use. And we are not just saying to turn the switch off, we mean going the extra mile and unplugging them from sockets. Machines and electronics may seem hardcore materials, but they are also prone to overheating and faults due to excessive use.

3 Be mindful of “Phantom loads”

Not even kidding this is a totally a major source of energy waste. This pertains to electricity used by electronics when they are turned off or in standby mode. Consider the use of smart power strips to eliminate this electricity fault.

4 Check your HVAC systems! They can be a huge factor for you to save energy

This abbreviation stands for Heating, Ventilation, and Air Conditioning. These are three things that also accept much energy in an establishment. There is a number of Fluke tools that can ideally help you with this.

For moisture intrusion:

  • Fluke Ti480 PRO Thermal Camera
  • Fluke 971 Temperature Humidity Meter

For heat loss:

  • Fluke 561 HVAC Infrared and Contact Thermometer
  • Fluke Ti480 PRO Thermal Camera

For monitoring indoor air quality:

  • Fluke 985 Particle Counter
  • Fluke 922 Airflow Meter/Micromanometer

For verifying HVAC system performance:

  • Fluke Ti480 PRO Thermal Camera or Fluke 561 HVAC Infrared and Contact Thermometer

Get your test tools through an authentic source!

Rest assured that through proper measurement, you can achieve the best energy-saving solutions for your establishment, homes, facilities, and businesses. So if you’re currently looking for the best-performing test tools in the market to run daily maintenance checks on your machines, you’re in luck cause Presidium PH is an authorized distributor of Fluke test tools in the Philippines. Prevent these faults from penetrating your machine by using the best test tools there are!

If you want to know more about Fluke tools and their functions, visit our website for more info! This is a one-stop-shop for the best test tools within Metro Manila.

Read more

What Is a Three-Phase Power Quality Logger?

Reliable, quick, and easy, the Fluke three-phase quality logger can perform all the needed studies to ensure the logging of power quality in every machine is accurate and reliable. Like any Fluke tool, the power logger can perform under pressure, is accurate (considering that you do calibration), and can withstand any rough environments. Ideally, this three-phase power quality logger can be used in three different areas of testing.

  • Electrical load studies
  • Energy consumption testing
  • General power quality logging
  • They measure harmonics
  • Electrical power parameters
  • Capturing of voltage events

However, that’s only a gist of what they do. Here, we’ll be able to know more about how a three-phase quality logger can contribute to your electrical machines.

They come with a lot of phases.

They are generally known as power quality loggers, but they also come in the name of “energy loggers”. So don’t get confused when you hear both terms. Anyhow, you’re probably wondering how these things have “a lot of phases”. However, what we truly mean by this is that it comes with variations. Moreover, if you’re spotting a power quality logger, you can find that there is a one-phase logger, two-phase, and of course, a three-phase power logger. So, it’s probably wise for you to assess your machine and your test projects first before getting one.

Its notable applications

Power quality loggers can be applied to different forms of testing. An authorized Fluke source pointed out its most beneficial functions when it comes to power quality logging. Here are some of them according to an official Fluke source.

  • Load studies – Verify electrical system capacity before adding loads.
  • Energy assessments – Quantify energy consumption before, and after improvements, to justify energy-saving devices.
  • Harmonics measurements – Uncover harmonic issues that can damage or disrupt critical equipment.
  • Voltage event capture – Monitor for dips and swells that cause spurious resets or nuisance circuit breaker tripping.

What does a three-phase quality logger do?

The thing about electrical power usage is that it is continuously and constantly changing. We may find wasted energy one day and wonder where it all came from. And this is the specialty of three-phase quality loggers. Ideally, the main priority of quality loggers is not only to detect the root cause of the problem but is also effective in doing all kinds of tests.

On the other hand, they can also do electrical load studies, energy consumption testing, and general power logging. Furthermore, with the use of Fluke’s three-phase power quality saving, you’ll be able to find out where and when you are consuming energy. A feature that is beneficial for you since you can know where you can adjust certain electrical practices, and this device gives you exactly that. As a result, you can now create credible power-saving strategies to avoid waste.

Finally, when you’re continuously logging energy usage, the three-phase quality logger can effectively assist you in quickly and easily identifying waste faults. Therefore, identifying saving opportunities can be all the easier for you.

The Fluke energy logger commands ease of use and quality performance.

A sweetener for every Fluke device is that it promises easy usability. Even a first-timer can be able to navigate his/her way through a Fluke device and it’s one of its winning qualities. But don’t be mistaken, this tool is more hardcore than you think. Here are more of them.

  • Record power and associated parameters for up to 45 days.
  • Monitor maximum power demand over user-defined averaging periods.
  • Prove the benefit of efficiency improvements with energy consumption tests.
  • Measure harmonic distortion caused by electronic loads.
  • Improve reliability by capturing voltage dips and swells from load switching.

Resolve these failures using Fluke Tools!

Hey, you made it to the bottom! Are you currently looking for the best-performing test tools in the market to run daily maintenance checks on your machines? You’re in luck cause Presidium PH is an authorized distributor of Fluke test tools in the Philippines. Prevent these faults from penetrating your machine by using the best test tools there are!

If you want to know more about Fluke tools and their functions, visit our website for more info! This is a one-stop-shop for the best test tools within Metro Manila.

Shop now: https://presidium.ph/shop/?wlfilter=1&product_cat=fluke-power-quality-analyzers

Read more

How Do We Test For Continuity Using Digital Multimeters?

As far as testing is concerned, testing for continuity also holds a big deal to know if something is wrong with your electrical circuit. It takes a significant stand in testing since it will allow you to know if there’s something wrong with the current flow. Technically, it checks if the current in the circuit is still continuous.

Think of it this way, if a straw is bent, little liquid can pass through it and if in such circumstances that it is punctured, then all liquids will likely seep through that hole. It is the same thing with electrical circuits. Devices will not function properly if the current can’t flow freely.

Watch out for these two things…

There are two things that you need to watch out for when you test for continuity. Mainly, these are the resistance between the two points measured. Ideally, low resistance means that there is electrical continuity. Meanwhile, high resistance means that the circuit is open and therefore, the continuity is lacking.

The best device to measure is a digital multimeter.

Fluke Digital Multimeters are one of the most versatile tools that a maintenance person can have. Not only does it boast advanced functions, but its efficiency is well-spoken. This infamous tool has all the qualities that Fluke tools possess, but the most notable one will truly be keeping workers safe from possible electrical hazards that are inevitable to happen.

These are the most preferred tools for testing continuity since digital multimeters can be used to test switches, fuses, electrical connections, conductors, and other components. Its flexibility to test multiple assets in one makes them the most suitable tool for the job.

Benefits of Continuity Testing

According to Power Assembles, in order for electricity to flow, things need to stay connected. Ideally, there can’t be any breaks in the pathway or there won’t be a continuous flow of electricity. And this is where the need for continuity testing comes in. One of the huge benefits that continuity testing holds is its ability to determine faults within electrical circuits that can be harmful to man in the long run. But that’s not all, take a look at the other benefits that they hold…

Other benefits of continuity testing:

  • Continuity testing can let you determine if a circuit is open, closed, or shorted.
  • It lets you know if a fuse is good or blown.
  • Makes sure a switch is operating properly.
  • Verifies wires operating on the same circuit.
  • Validates whether wire and cable assemblies are functional.
  • Helps test the resistance of conductors.

Here’s a quick guide on how you can do continuity testing using digital multimeters.

Let’s go into detail on how you can safely perform a continuity test using your digital multimeter. And no, it’s not as complicated as you may think. It’s actually fairly easy to understand, it only takes a couple of steps for you to give this a shot. According to an official Fluke source, here’s how you can do it…

  1. First, insert the black test lead into the COM jack.
  1. Then insert the red lead into the VΩ jack. When finished, remove the leads in reverse order: red first, then black.
  1. With the circuit de-energized, connect the test leads across the component being tested. The position of the test leads is arbitrary. Note that the component may need to be isolated from other components in the circuit.
  1. The digital multimeter (DMM) beeps if a complete path (continuity) is detected. If the circuit is open (the switch is in the OFF position), the DMM will not beep.
  1. When finished, turn the multimeter OFF to preserve battery life.

Get your digital multimeters through an authentic source!

Hey, you made it to the bottom! Are you currently looking for the best-performing test tools in the market to run daily maintenance checks on your machines? You’re in luck cause Presidium PH is an authorized distributor of Fluke test tools in the Philippines. Prevent these faults from penetrating your machine by using the best test tools there are!

If you want to know more about Fluke tools and their functions, visit our website for more info! This is a one-stop shop for the best test tools within Metro Manila.

Shop Now: https://presidium.ph/?s=clamp+meter+

Read more

Electrical Measurement Safety: How to Test Your Test Leads?

Test leads are a common sight to maintenance and women who are constantly working in electrical testing. It is also a known tool for electrical measurement safety that is often seen connected to digital multimeters. What most users do not know is that it is a Fluke accessory that is ideal to use in every operation especially if you’re using a digital multimeter (or a Fluke device that can be connected to test leads).

Importance of test leads.

Some people might think that it’s okay to measure without leads. But having to do so is very unwise. Never take your leads for granted. Even with the use of the infamous Fluke tools, you will still not be completely bulletproof when a hazardous occurrence takes place.

Test Leads will act as the first line of defense when you encounter high currents. Given the electrical measurement safety that it provides users, it makes it an essential part of test tools, especially for digital multimeters.

Make sure that your test leads are safe to use.

It is partly common knowledge that test leads are a vital part of every digital multimeter. With this said, you need to make sure that they are always in good working condition. Keep in mind that Fluke test tools are always going to be something more when they are paired with Fluke accessories like test leads. But beware, test leads may seem like a durable accessory but they are also prone to over usage and wear, making them decrease in performance.

Therefore, it is particularly important for you to inspect them before and after usage. A malfunctioning test lead can make matters worse for you than you think. In the maintenance department where accurate reading is necessary, a worn test lead may just get you into trouble. You see, test leads are prone to giving inaccurate readings when they are (1) under-rated, (2) worn, and (3) poorly manufactured.

Prevent the possible hazards.

Although test leads are naturally safe to use, there is an excessively significant difference once it starts to get old. Ideally, all test tools and accessories need a keen eye as well as all sorts of maintenance checks to keep them in good working condition. And this does not leave out test leads. If there are no maintenance checks for these test tools, daily maintenance operations might take a turn for the worst.

Remember that test leads are our first line of defense when working with high currents? Well, at worst and your test leads are in real bad shape to perform any extremely sensitive maintenance checks, then your test leads may provoke electrocution and shock hazards for the user. Therefore, it is very much preferred to also check your test leads to prevent the possible hazards that they may pose.

Do not forget to evaluate the test leads!

You read it right, your test leads also need to evaluate to ensure that they are still fit to do readings accurately and safely. It is simple to apply these in your day-to-day tool maintenance check. Trust that caring for your test leads early on can reap rewards in terms of future use. This will ensure accurate readings in every electrical measurement operation. Here’s how you’ll do it according to an official Fluke source!

Assessing the test leads:

  • Make sure to evaluate the leads while it is plugged into your DMM (digital multimeter).
  • Assess your leads using a simple OHMs measurement to ensure reliability.
  • You may isolate a problem to one lead or the other by assessing them separately.
  • If you are doing separate testing, simply connect one lead at a time between the ohms and common input.
Photo Source: Newark

Additional Tips: Conduct an inspection for your test leads.

Some of the underlying issues of test leads can be seen in plain sight. A visual inspection might just do it. It is simple, doable, and will not require much of your time. That is if you know what you are looking for and where to look for faults.

When you are conducting a visual inspection, you should (1) check the insulation. Make sure that it is not cracked or nicked. This is because with age the insulation material—whether PVC or

silicone—can become dried out, brittle, and susceptible to cracking. (2) Be sure that there are no gaps or cracks located at the junction between the insulated wire and the banana-like plugs at each end.

Resolve these failures using Fluke Tools!

Hey, you made it to the bottom! Are you currently looking for the best-performing test tools in the market to run daily maintenance checks on your machines? You are in luck cause Presidium PH is an authorized distributor of Fluke test tools in the Philippines. Prevent these faults from penetrating your machine by using the best test tools there are!

If you want to know more about Fluke tools and their functions, visit our website for more info! This is a one-stop shop for the best test tools within Metro Manila.

Shop now: https://presidium.ph/?s=test+leads+

Read more

How Often Should You Calibrate?

Calibrate your Fluke tools to keep them in pristine shape. For test tools, calibration is one of the utmost crucial steps for you to maintain their performance level and their accuracy in reading and testing. Many may think that calibration happens only once, but you need to do it based on the exposure to stress that your Fluke tool experiences. But the question remains, how often should we calibrate fluke tools?

There is additional to it than simply ensuring that the tools are dependable and safe. Take note that there are multiple calibration tools and not just one to ensure that all products and Fluke equipment are accounted for. There is also a thing called calibration intervals which also stands on important grounds when you are planning to do this on a regular basis, but we’ll get to that in a bit.

Importance of calibration

Fluke builds to last. The durability of products is one aspect that Fluke considers when building test tools. Therefore, Fluke is known for its rugged features and its ability to withstand harsh elements. Moreover, it can tolerate strenuous activities and pressure since these test tools are built to keep workers safe and confident working in risky environments. And that is what makes them so sought-after. Initially, when Fluke builds a product, one of the most important things we think about is how our instruments perform over time. And this is where calibration comes in.

Calibration ensures that the device is still well-equipped to manage activities that are in a high-pressure environment.  Moreover, performing calibration can reap rewards overall since you will be able to determine errors, faults, and the limits of your test tool.

What are Calibration Intervals?

Be aware of calibration intervals. As the name itself suggests, calibration intervals are the time in between calibration tests. It is the period that the test tools need before going back for a recalibration session. There is no hard rule for calibration but there is a couple of things you need to remember to determine whether your Fluke tools need one.

How often do you need to calibrate?

The utmost accurate calibration is twenty minutes intervals! We know that is a close call but don’t worry, this doesn’t mean that you need to calibrate every twenty minutes. A one-year calibration is preferred. But that is not only the one specific timeline that you must keep track of. If your Fluke tool is frequently in use and is mostly exposed to harsh environments, you might need to calibrate more often. Here is a quick guide to it!

Calibrate through manufacturer recommendation.

These are calibration instructions based on the manual itself. You can find your manuals tucked in the box of your Fluke tool. Every box has a warranty inside, if it doesn’t have one, then you better have a chat with your supplier. Those aren’t official Fluke products.

Also, keep in mind that the calibration interval may be different for each tool depending on the gravity of its usage.

Calibrate before undergoing a major critical measuring project.

It is preferred for you to calibrate your Fluke device accordingly before an extremely sensitive operation. Let us say you are about to do testing that requires accurate results. To achieve this, you need to prep your Fluke tool through calibration. Keep in mind that the older your Fluke tool is, the more it needs calibration to ensure that it is still at the tip of its performance.

Take note that operating on an extremely sensitive project may require you to act based on your finding. This fact makes it even more important for you to calibrate accordingly.

Calibrate after a major critical measuring project.

Calibrating before the project is just as important as calibrating your Fluke device after. In some industries that rely on accurate data. It is actually a required process for them to also calibrate after the testing. This is done because it ensures that the reference used can either show an intolerant condition before, during, or after the measurement project.

Calibrate monthly, quarterly, or semi-annually

As we’ve stated before, calibration is truly a recommended step for every Fluke test tool. The shorter the time span of your calibration, the better. This will ensure that your tools are in good reading condition. Plus, this will prevent you from receiving questionable readings during your operations.

So really, calibrate your Fluke tool whenever you can. Make it monthly, quarterly, annually, semi-annually, etc. Just always remember to calibrate your tool to keep them at their peak performance during every operation. But of course, the decision still stands with the user. You can either opt for shorter cycles or longer cycles depending on the results.

Calibrate through an authentic source!

Presidium PH is an authorized distributor of Fluke test tools in the Philippines. Rest assured that all tools have gone through calibration and proper tests. Prevent faults from penetrating your projects that might cause bad downtimes by using the best test tools there are!

If you want to know more about Fluke tools and their functions, visit our website for more info! This is a one-stop shop for the best test tools within Metro Manila.

Email us at calservices@presidium.ph / info@presidium.ph

Read more

Pressure Calibrating Transmitters in Potentially Explosive Atmospheres

It is always a challenging feat to perform operations in a potentially dangerous environment. And even with the greatest test tools that adhere to its user’s safety, you cannot be completely complacent. Pressure calibrating can pose a challenging task when done in a potentially explosive atmosphere. Therefore, when faced with such an assignment, make sure that you have undergone proper training and are equipped with the right equipment.

A deeper understanding of “intrinsically safe”

Primarily, to conduct pressure calibration in a high-risk atmosphere, you need a tool that is deemed “intrinsically safe”. To give a simple explanation, if your tool is intrinsically safe, it means that it is designed to prevent the release of sufficient energy by either thermal or electrical means. Doing so will cause the ignition of flammable material such as gas or dust particles.

In general, intrinsically safe standards don’t just apply to one device or a certain operation, but it applies to all tools and devices that are regularly exposed to potential explosive sources. Here are some of them…

  • Electrical sparks
  • Electrical arcs
  • Flames
  • Hot surfaces
  • Static electricity
  • Electromagnetic radiation
  • Chemical reactions
  • Mechanical impact
  • Mechanical friction
  • Compression ignition
  • Acoustic energy
  • Ionizing radiation

If you are a technician or maintenance man working in industries such as mining, petrochemical, pharmaceutical, or something that exposes you to explosive gases then make sure that your devices are deemed intrinsically safe. Remember, that you are the best asset on the field, so do not take any chances of proceeding with your operation without safe tools to use.

How to pressure calibrate a transmitter in a risky environment.

Now you know all about the device’s safety, let us move on to pressure calibrating a transmitter. It is already a given that you’ll probably tread on eggshells the entire time and try not to provoke the explosive substances that are surrounding you. However, that is not all you need to worry about. The most important thing that you need to do is to perform the procedure carefully and with precision.

Here’s how you can do it according to an official Fluke source:

  1. Depressurize and isolate the transmitter. If opening the transmitter exposes voltages beyond the Intrinsic Safe (I.S.) rating use a continuous monitoring gas detector to monitor for explosive gases.
  2. Plumb the transmitter to the 1/8 inch NPT pressure port of the 718Ex. Connect the test leads per the figure above.
  3. Turn the calibrator on. Vent the calibrator and press zero to zero the pressure displayed. Close the vent control.
  4. Press the UNITS key until PSI shows in the display.
  5. With the 718Ex’s bleed valve open to the atmosphere, press the ZERO key. Close the bleed valve. Set the pressure/vacuum valve to +, for positive pressure.
  6. Use the hand pump to apply 3 psi to the transmitter. Partial pump strokes will apply small increments of pressure. Use the fine-adjust knob to get close to 3.00 psi.
  7. Press the HOLD key and record the psi and mA readings. Press the HOLD key to resume reading.
  8. Calculate and record the error, using: Error = ([(i-4)/16] – [(P-3)/12]) * 100 where Error is in % of span, i is your measured current in mA, and P is your measured pressure in psi.
  9. Repeat steps 5 through 7 at mid-range, around 9 psi, to check linearity at mid-span.
  10. Repeat steps 5 through 7, now at 15 psi, for a check at 100 % of span.
Photo Source: https://us.flukecal.com/literature/articles-and-education/pressure-calibration/application-notes/calibrating-pressure-transm

Purchase from an authentic source!

Hey, you made it to the bottom! Are you currently looking for the best-performing test tools in the market to run daily maintenance checks on your machines? You are in luck cause Presidium PH is an authorized distributor of Fluke test tools in the Philippines.

If you want to know more about Fluke tools and their functions, visit our website for more info! This is a one-stop shop for the best test tools within Metro Manila.

Visit our website https://presidium.ph/shop/?wlfilter=1&product_cat=fluke-calibration to know more about our fluke calibration products.

Read more

The Importance Of Electrical Grounding

What is electrical grounding?

Indeed, people have made notable advancements in the electricity department and electrical grounding is one of its big improvements. Technically, electrical grounding is storing electricity on the ground to prevent fatal risks from occurring. It is the process of connecting electrical panels, electrical motors, installations, electrical controls, etc, to the earth. As a result, this will make the environment safer for people since it reduces dangers from civilians and equipment.

What happens if I do not do electrical grounding?

You will be exposed to fatal shocks if your currents are not grounded. So, there are three things about wiring that you need to know about. Ideally, there is an active wire, a neutral wire, and a grounding wire. So, let us look at each one of them closely.

An active wire is the one that supplies power to the wires. Meanwhile, the neutral wire is the one that carries the current back. Lastly, the grounding wire is the one that can be attached to outlets as well as other electrical devices to be connected to the ground at the breaker box.

Originally, the grounding wire is only an additional feature. However, regardless of their “newness” grounding wires holds the most advantageous feature for people since it gives them complete protection from fatal shocks. The grounding wires work for electrical current to safely return to the ground.

As a result, if a short circuit did occur the current would flow through the ground wire causing a blown fuse or tripped circuit breaker. Better a blown fuse or a tripped circuit breaker than a fatal shock, right?

Benefits of proper grounding

Let us face it. Grounding is also one of the most overlooked aspects when it comes to electrical wiring. Nevertheless, according to Platinum Electricians, grounding your wires is an ideal choice to provide protection against possible shocks. They explained. “Grounding your electrical system is a smart and effortless way to make it a whole lot safer, as well as to protect against the very real possibility of having to deal with fluctuations in power supply.”

Just imagine if an electrical error occurs such as lightning strikes or power surges. When you have no electrical grounding, this will cause metal components to function as conductive surfaces. Therefore, these surfaces become electrically energized. And when people touch these surfaces, they will get shocked in the process.

Platinum Electricians further explained by saying, “If you want to safeguard all of your important assets, whether at home or at the office, as well as a lookout for the health and safety of everyone around you, find out if your electrical system is grounded”.”

Advantages of proper grounding according to Conserve Online:

  • Eliminates shock hazard
  • Protects equipment from voltage
  • Prevents electrical fires
  • Reduces equipment repair cost and downtime
  • Lowers levels of electrical noise (fluctuations in an electrical signal)

Why do you need electrical grounding

Not only does it bring notable safety benefits for people and their equipment, but it also brings a lot to the table overall. So, if you do not want your electricity grounded, you might want to think again. Take note of these four significant reasons why you should.

  • Electrical grounding protects against electrical overloads.
  • It stabilizes voltage levels
  • Earth conducts with least resistance
  • It prevents severe damage and death

Resolve these failures using Fluke Tools!

Hey, you made it to the bottom! Are you currently looking for the best-performing test tools in the market to run daily maintenance checks on your machines? You are in luck cause Presidium PH is an authorized distributor of Fluke test tools in the Philippines. Prevent these faults from penetrating your machine by using the best test tools there are!

If you want to know more about Fluke tools and their functions, visit our website for more info! This is a one-stop shop for the best test tools within Metro Manila.

List of Fluke models: https://presidium.ph/earth-ground-testers/

Read more