5 Amazing Things About Fluke Pocket Thermal Cameras

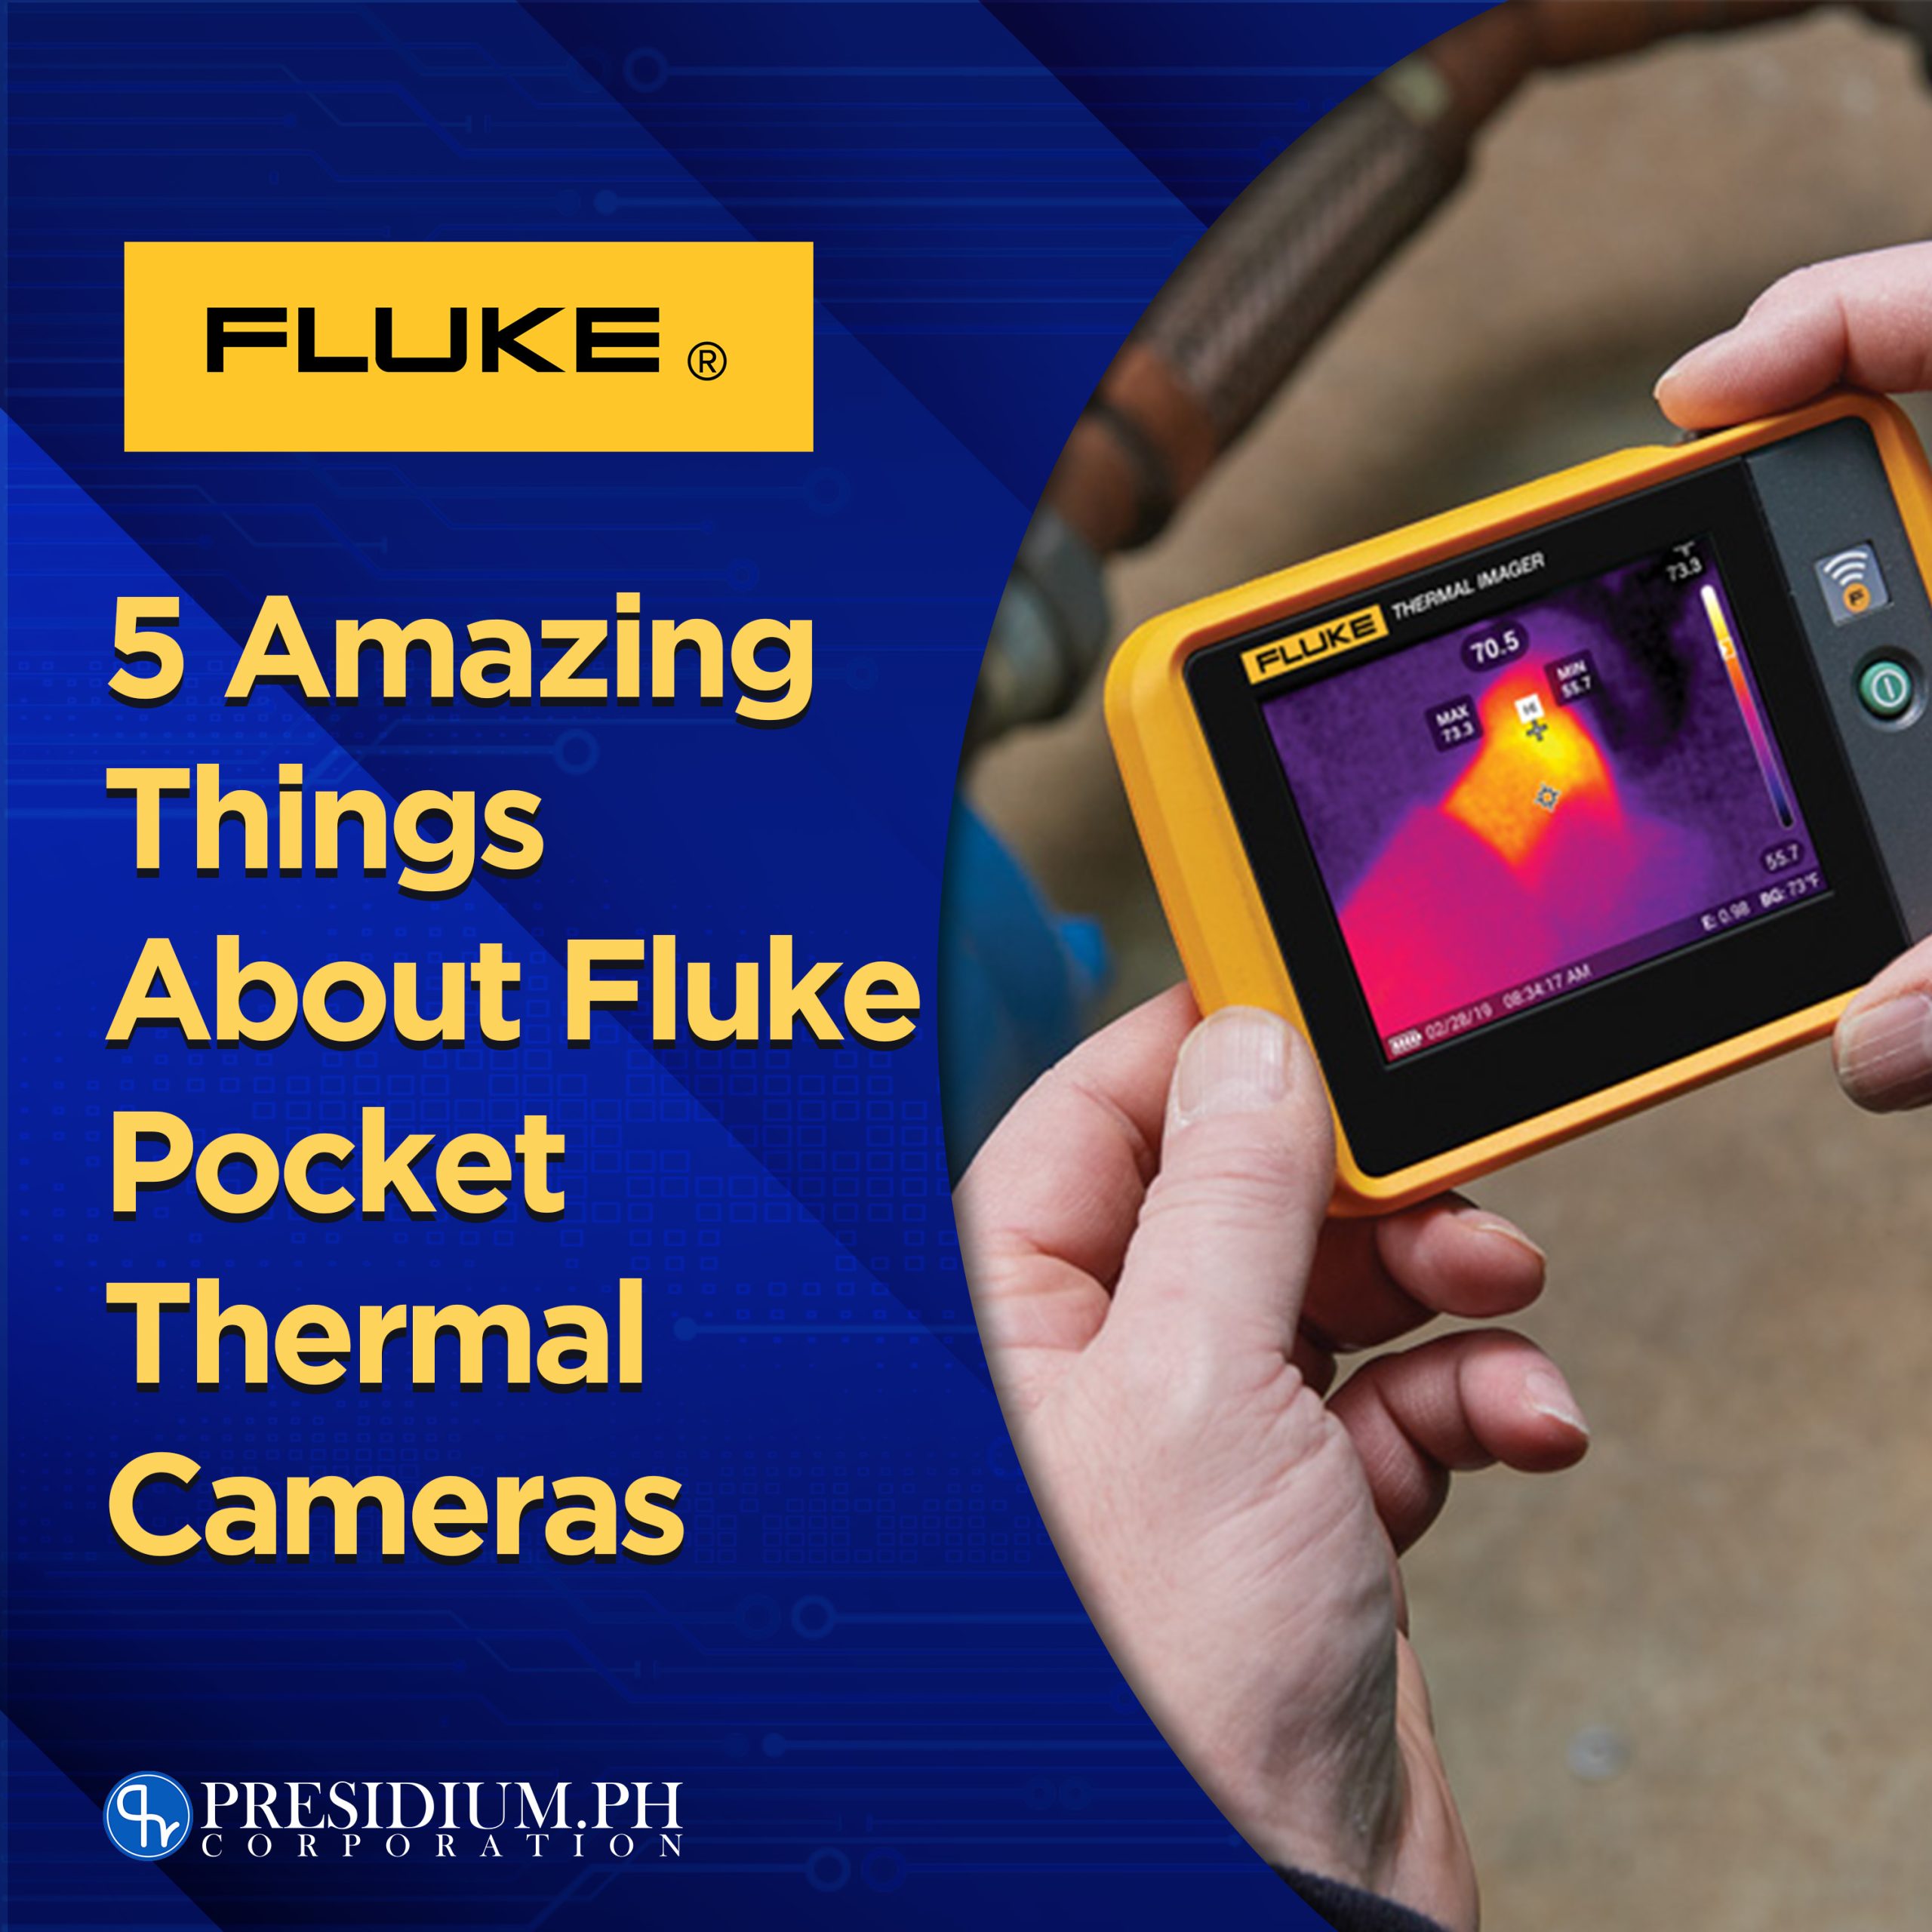
We all know Fluke thermal cameras come in a big telephone-like structure, but did you know that there’s a portable one? Small but terrible is a way to describe the Compact Fluke PTi120 Pocket Thermal Camera. You would never wish to underestimate its capabilities since it boasts absolute efficiency and ease for workers who are in the industrial field.

Technically, having anything portable always stands as efficient and useful. This pocket thermal camera is considered one of the favored devices for industrial workers for its small design. But this little tool isn’t just known for its “portable” nature, but it also has a lot of amazing functions and benefits to offer workers during operations.

The benefits of Fluke Pocket Thermal Cameras…

Regular inspections can help you develop great quality in terms of machine work. And one of the tools that promote the quality of industrial machines is none other than Fluke pocket thermal cameras. Even informal inspections hold so much importance. In line with this, using a small thermal camera can give you an opportunity to give machines a quick scan.

By doing this, you’ll have more advantages of knowing faults before waiting for drastic measures to take a turn. Pocket thermal cameras can be very well helpful. You can simply fit it into your back pocket and take it out whenever you feel like there’s something fishy about how your machine’s acting.

1 It is portable that you can fit it in your pockets.

Sometimes, big problems require small solutions. One of the best advantages of pocket thermal cameras is being small. Who doesn’t want devices that can fit in your pockets? Its sleek frame can easily fit anywhere! You won’t even get bothered by its weight since the Fluke pocket thermometers are considerably light. This is definitely one tool that you want to have with you the entire day when making inspection rounds, or if you need a handy device that you can pull out any time when the situation calls for it.

2 You can automatically save your thermal images.

Devices nowadays are truly a wonder. They make your life easier, and the Fluke pocket thermal cameras are not indifferent to this innovation. By using this tool, you won’t have to undergo the painful process of taking out USBs and sticking them to the right places, rather now, all you need is wifi.

Yes, that’s right, you can now take thermal images and send them with your Fluke tool via wifi! In this way, you can send real-time diagnostics as soon as you get the results. This will be advantageous in reducing unwanted downtimes and providing timely and accurate diagnostics.

3 Use it for quick temperature scans.

As we’ve mentioned, these pocket thermal cameras are ideal for quick temperature scans since they will likely be tucked in your pockets for the entire day. This camera can also be beneficial in pinpointing and conducting simple and fast tests for possible issues with pieces of equipment. You no longer need to walk long distances to get the right tool for the job since the best tool for it can already fit in your pockets!

4 Small but durable!

As all Fluke tools are known, they are undeniably rugged, safe, and reliable. And these qualities don’t cancel out even the smallest of tools. You might think that the Fluke pocket thermal camera is fragile, but you might want to think again. With an IP54 enclosure rating and a 1-meter drop survival, the PTi120 was built to be tossed in your tool bag. It can endure rough handling, yes, but keep in mind that the longevity of your tools depends on how you care for them.

5 You can get your preferred level of infrared.

Make locating problems easier by simply adjusting the visible light image. Detecting hot and cold spots is generally quite difficult without a trained eye, especially spotting the problematic ones. However, rest assured that the Fluke pocket thermal camera can be able to make your life easier by being its user-friendly self. In this way, second-guessing and false results can be minimized to a down low! Cool right?

Get your Fluke tools through an authentic source!

Hey, you made it to the bottom! Are you currently looking for the best-performing test tools in the market to run daily maintenance checks on your machines? You’re in luck cause Presidium PH is an authorized distributor of Fluke test tools in the Philippines. Prevent these faults from penetrating your machine by using the best test tools there are!

If you want to know more about Fluke tools and their functions, visit our website for more info! This is a one-stop-shop for the best test tools within Metro Manila.

Read more

4 Common Electrical Grounding Mistakes

Upright grounding is more than a safety feature. In fact, it safeguards tools, equipment, and other devices that are supplied in the facility. Therefore, effective grounding procedures must take place in every part of a project and must never be overlooked. With the absence of proper grounding systems, you might be able to expose yourself to the risk of electric shock and instrument errors. However, at times, there are grounding errors that cannot be assisted. Here, we will be able to discuss the five common electrical grounding mistakes that some people make.

Why test ground systems?

Soils do not stay the same over time. Corrosive soils, high moisture content, salt, content, and elevated temperatures, can decrease the quality of your soil. In a natural setting, this might be okay for backyard gardens. However, if you are building extremely sensitive projects on top of it, you might want to double-check if the soil is compatible with the proper standards.

According to an official Fluke source, faulty ground systems will omit electrical problems that will result in unwanted downtimes. The root causes. Poor grounding and poor power quality.

The common electrical grounding mistakes…

There are different projects that require proper grounding. One can differ from the other, but one thing rings true, and that is never to forget proper grounding.

1 Do understand soil resistivity.

The number one of a grounding system is to provide a low impedance route to the earth. Going back, soil resistivity plays a significant role in the process since it is the main basis of any grounding system. It relates to a lot of functions including soil type, moisture content, and temperatures. These kinds of characteristics pave the way for ground impedances.

Take note that the current will likely follow through a path of low resistance rather than a high one. High soil resistance will result in unsafe paths that will eventually increase equipment failures and human injuries.

2 Failing to measure the grounding system.

One thing you need to check is the grounding systems if there are any vacancies. Make sure that there are none so to speak of. A variance may occur over time that was not intended for. As an example, if a ground rod hits a large rock and it does not reach the depth that it’s required to be at this may cause complications.

3 Always reattach ground paths.

In such instances that you must relocate, replace, or remove equipment for repairs, it is of utmost importance that you reconnect the entire path completely. Technically, all connection in the ground path includes setscrews, locknuts, and threads. You should fully evaluate the continuity before putting them back into the system.

Also, it is probably best for you to check for any corrosion, rust, and dirt since impurities can contaminate metal raceways.

4 Using ground wire incorrectly

Pay attention to the conductor’s bends and lengths! Ground wires that are bundled up together can create high impedance and this will give way to higher voltages on the equipment during transient events. Also, refrain from coiling the wires since this will prevent the current to go through a straight and simple path.

Standards for ground testing…

Not sure if you are meeting the standard for grounding? Here’s something to guide you along the way! These organizations provide recommendations and/or develop standards for grounding to ensure safety.

Remember, the goal of these grounding standards is to help you ensure the reliability of your equipment in such cases that faulty currents occur.

Purchase from an authentic source!

Hey, you made it to the bottom! Be sure to check out Fluke Earth Ground Testers through our official site! Are you currently looking for the best-performing test tools in the market to run daily maintenance checks on your machines? You are in luck cause Presidium PH is an authorized distributor of Fluke test tools in the Philippines.

If you want to know more about Fluke tools and their functions, visit our website for more info! This is a one-stop-shop for the best test tools within Metro Manila.

https://presidium.ph/shop/?wlfilter=1&product_cat=fluke-earth-ground-testers
Read more

Smart Ways to Save Energy and Prevent Downtime

Fluke is a powerhouse tool that can see, hear, and detect all kinds of electricity-related health situations. And that is only one out of a hundred reasons why it is favored by maintenance men and women all over the world. But Fluke tools can only do so much when people get a bit dismissive about caring for their electronics and electricity in general. Therefore energy-saving has become a smart practice for most households, buildings, and facilities. Today, we’ll teach you how to save energy using the most profound test tools in the industry – Fluke test tools.

Moreover, considering downtimes, electricity usage, when abused, can cause downtime. Like all things electronic, they are also prone to wear and faults with excessive use. Therefore adopting healthy practices is always preferable when consuming energy on a daily basis.

Importance of saving energy.

So, when we’re talking about how to save energy, we are not just singling out completely avoiding its use, but rather, we want to introduce smart ways on how you can do it. Energy-saving is a strategy that can completely help the environment, but other than that, it also comes in handy in preventing downtime incidents, abusing your electronics, and inducing excessive use of them.

Take facilities for example. It’s a given fact that most facilities take up loads of energy. And what most people might think is a natural thing that they no longer need to save energy, is a huge misconception. Energy takes up money, and when the electric bills pile up, most managers tend to have a double-take. Remember, we are no longer living in the last decade, this is the 21st century, and prices are hiked up. A quick solution? Have your equipment and machines evaluated and measured. You will never know, one machine might already be causing havoc in a way that is affecting your electric bills, the surrounding environment, and the people working close to it.

To this day, electricity and its availability are almost infinite which is why monitoring, measuring, and testing take a huge significance in establishments. Therefore, we need to consume energy in the most conducive way. In all honesty, electricity and how it is important to our day-to-day tasks can make or break productivity. That’s why, with proper monitoring, we are also at the same time, caring for our businesses or our homes.

Why measurement is relevant to save energy…

In all fairness, measurement is crucial in every point of work to know where you needed to align, adjust, and most of all make strategic decisions to meet goals. This is like our current topic. To save energy, you need to know how much energy is being wasted, you need to gauge if the equipment and machines are the ones that are causing them, and you also need to know which ones need immediate solutions.

Above else, data and logging still reign supreme in businesses, in maintenance, and in a lot of aspects that entail work. You need to measure how much energy you are taking up and see if the numbers are still aligning. This will allow you to document energy waste and machine faults. This information plays a crucial part for future reference.

Ways to save energy…

One of the very known characteristics of Fluke tools is its ability to promote energy-saving, and electronic care, and to give solid solutions to maintenance problems concerning electric machines. The very first thing you want to know when you are saving energy is the health of your electric machines and the overall power that holds them.

And with the help of Fluke tools, this is now achievable in quick and efficient ways. You see, when your electronics are spilling out energy everywhere without you knowing, then your energy-saving methods might be all for naught. This is something you want to check up on daily, especially if you are consuming them every day. So, here are things to keep in mind, on ways to save energy.

1 Mind your bulbs! They can be beneficial to save energy

If you are working in a huge facility, using traditional incandescent lightbulbs can consume excessive amounts of electricity. Try using halogen incandescent bulbs and compact fluorescent lights. Also, take note that fluorescent lights can also have faults. Therefore, it is also preferred for you to use a Fluke Fluorescent Light Tester for easier detection of underlying faults.

2 Turning off lights or appliances to save energy

The simplest and easiest way to save energy is to unplug them when not in use. And we are not just saying to turn the switch off, we mean going the extra mile and unplugging them from sockets. Machines and electronics may seem hardcore materials, but they are also prone to overheating and faults due to excessive use.

3 Be mindful of “Phantom loads”

Not even kidding this is a totally a major source of energy waste. This pertains to electricity used by electronics when they are turned off or in standby mode. Consider the use of smart power strips to eliminate this electricity fault.

4 Check your HVAC systems! They can be a huge factor for you to save energy

This abbreviation stands for Heating, Ventilation, and Air Conditioning. These are three things that also accept much energy in an establishment. There is a number of Fluke tools that can ideally help you with this.

For moisture intrusion:

  • Fluke Ti480 PRO Thermal Camera
  • Fluke 971 Temperature Humidity Meter

For heat loss:

  • Fluke 561 HVAC Infrared and Contact Thermometer
  • Fluke Ti480 PRO Thermal Camera

For monitoring indoor air quality:

  • Fluke 985 Particle Counter
  • Fluke 922 Airflow Meter/Micromanometer

For verifying HVAC system performance:

  • Fluke Ti480 PRO Thermal Camera or Fluke 561 HVAC Infrared and Contact Thermometer

Get your test tools through an authentic source!

Rest assured that through proper measurement, you can achieve the best energy-saving solutions for your establishment, homes, facilities, and businesses. So if you’re currently looking for the best-performing test tools in the market to run daily maintenance checks on your machines, you’re in luck cause Presidium PH is an authorized distributor of Fluke test tools in the Philippines. Prevent these faults from penetrating your machine by using the best test tools there are!

If you want to know more about Fluke tools and their functions, visit our website for more info! This is a one-stop-shop for the best test tools within Metro Manila.

Read more

What Is a Three-Phase Power Quality Logger?

Reliable, quick, and easy, the Fluke three-phase quality logger can perform all the needed studies to ensure the logging of power quality in every machine is accurate and reliable. Like any Fluke tool, the power logger can perform under pressure, is accurate (considering that you do calibration), and can withstand any rough environments. Ideally, this three-phase power quality logger can be used in three different areas of testing.

  • Electrical load studies
  • Energy consumption testing
  • General power quality logging
  • They measure harmonics
  • Electrical power parameters
  • Capturing of voltage events

However, that’s only a gist of what they do. Here, we’ll be able to know more about how a three-phase quality logger can contribute to your electrical machines.

They come with a lot of phases.

They are generally known as power quality loggers, but they also come in the name of “energy loggers”. So don’t get confused when you hear both terms. Anyhow, you’re probably wondering how these things have “a lot of phases”. However, what we truly mean by this is that it comes with variations. Moreover, if you’re spotting a power quality logger, you can find that there is a one-phase logger, two-phase, and of course, a three-phase power logger. So, it’s probably wise for you to assess your machine and your test projects first before getting one.

Its notable applications

Power quality loggers can be applied to different forms of testing. An authorized Fluke source pointed out its most beneficial functions when it comes to power quality logging. Here are some of them according to an official Fluke source.

  • Load studies – Verify electrical system capacity before adding loads.
  • Energy assessments – Quantify energy consumption before, and after improvements, to justify energy-saving devices.
  • Harmonics measurements – Uncover harmonic issues that can damage or disrupt critical equipment.
  • Voltage event capture – Monitor for dips and swells that cause spurious resets or nuisance circuit breaker tripping.

What does a three-phase quality logger do?

The thing about electrical power usage is that it is continuously and constantly changing. We may find wasted energy one day and wonder where it all came from. And this is the specialty of three-phase quality loggers. Ideally, the main priority of quality loggers is not only to detect the root cause of the problem but is also effective in doing all kinds of tests.

On the other hand, they can also do electrical load studies, energy consumption testing, and general power logging. Furthermore, with the use of Fluke’s three-phase power quality saving, you’ll be able to find out where and when you are consuming energy. A feature that is beneficial for you since you can know where you can adjust certain electrical practices, and this device gives you exactly that. As a result, you can now create credible power-saving strategies to avoid waste.

Finally, when you’re continuously logging energy usage, the three-phase quality logger can effectively assist you in quickly and easily identifying waste faults. Therefore, identifying saving opportunities can be all the easier for you.

The Fluke energy logger commands ease of use and quality performance.

A sweetener for every Fluke device is that it promises easy usability. Even a first-timer can be able to navigate his/her way through a Fluke device and it’s one of its winning qualities. But don’t be mistaken, this tool is more hardcore than you think. Here are more of them.

  • Record power and associated parameters for up to 45 days.
  • Monitor maximum power demand over user-defined averaging periods.
  • Prove the benefit of efficiency improvements with energy consumption tests.
  • Measure harmonic distortion caused by electronic loads.
  • Improve reliability by capturing voltage dips and swells from load switching.

Resolve these failures using Fluke Tools!

Hey, you made it to the bottom! Are you currently looking for the best-performing test tools in the market to run daily maintenance checks on your machines? You’re in luck cause Presidium PH is an authorized distributor of Fluke test tools in the Philippines. Prevent these faults from penetrating your machine by using the best test tools there are!

If you want to know more about Fluke tools and their functions, visit our website for more info! This is a one-stop-shop for the best test tools within Metro Manila.

Shop now: https://presidium.ph/shop/?wlfilter=1&product_cat=fluke-power-quality-analyzers

Read more

How Often Should You Calibrate?

Calibrate your Fluke tools to keep them in pristine shape. For test tools, calibration is one of the utmost crucial steps for you to maintain their performance level and their accuracy in reading and testing. Many may think that calibration happens only once, but you need to do it based on the exposure to stress that your Fluke tool experiences. But the question remains, how often should we calibrate fluke tools?

There is additional to it than simply ensuring that the tools are dependable and safe. Take note that there are multiple calibration tools and not just one to ensure that all products and Fluke equipment are accounted for. There is also a thing called calibration intervals which also stands on important grounds when you are planning to do this on a regular basis, but we’ll get to that in a bit.

Importance of calibration

Fluke builds to last. The durability of products is one aspect that Fluke considers when building test tools. Therefore, Fluke is known for its rugged features and its ability to withstand harsh elements. Moreover, it can tolerate strenuous activities and pressure since these test tools are built to keep workers safe and confident working in risky environments. And that is what makes them so sought-after. Initially, when Fluke builds a product, one of the most important things we think about is how our instruments perform over time. And this is where calibration comes in.

Calibration ensures that the device is still well-equipped to manage activities that are in a high-pressure environment.  Moreover, performing calibration can reap rewards overall since you will be able to determine errors, faults, and the limits of your test tool.

What are Calibration Intervals?

Be aware of calibration intervals. As the name itself suggests, calibration intervals are the time in between calibration tests. It is the period that the test tools need before going back for a recalibration session. There is no hard rule for calibration but there is a couple of things you need to remember to determine whether your Fluke tools need one.

How often do you need to calibrate?

The utmost accurate calibration is twenty minutes intervals! We know that is a close call but don’t worry, this doesn’t mean that you need to calibrate every twenty minutes. A one-year calibration is preferred. But that is not only the one specific timeline that you must keep track of. If your Fluke tool is frequently in use and is mostly exposed to harsh environments, you might need to calibrate more often. Here is a quick guide to it!

Calibrate through manufacturer recommendation.

These are calibration instructions based on the manual itself. You can find your manuals tucked in the box of your Fluke tool. Every box has a warranty inside, if it doesn’t have one, then you better have a chat with your supplier. Those aren’t official Fluke products.

Also, keep in mind that the calibration interval may be different for each tool depending on the gravity of its usage.

Calibrate before undergoing a major critical measuring project.

It is preferred for you to calibrate your Fluke device accordingly before an extremely sensitive operation. Let us say you are about to do testing that requires accurate results. To achieve this, you need to prep your Fluke tool through calibration. Keep in mind that the older your Fluke tool is, the more it needs calibration to ensure that it is still at the tip of its performance.

Take note that operating on an extremely sensitive project may require you to act based on your finding. This fact makes it even more important for you to calibrate accordingly.

Calibrate after a major critical measuring project.

Calibrating before the project is just as important as calibrating your Fluke device after. In some industries that rely on accurate data. It is actually a required process for them to also calibrate after the testing. This is done because it ensures that the reference used can either show an intolerant condition before, during, or after the measurement project.

Calibrate monthly, quarterly, or semi-annually

As we’ve stated before, calibration is truly a recommended step for every Fluke test tool. The shorter the time span of your calibration, the better. This will ensure that your tools are in good reading condition. Plus, this will prevent you from receiving questionable readings during your operations.

So really, calibrate your Fluke tool whenever you can. Make it monthly, quarterly, annually, semi-annually, etc. Just always remember to calibrate your tool to keep them at their peak performance during every operation. But of course, the decision still stands with the user. You can either opt for shorter cycles or longer cycles depending on the results.

Calibrate through an authentic source!

Presidium PH is an authorized distributor of Fluke test tools in the Philippines. Rest assured that all tools have gone through calibration and proper tests. Prevent faults from penetrating your projects that might cause bad downtimes by using the best test tools there are!

If you want to know more about Fluke tools and their functions, visit our website for more info! This is a one-stop shop for the best test tools within Metro Manila.

Email us at calservices@presidium.ph / info@presidium.ph

Read more

Pressure Calibrating Transmitters in Potentially Explosive Atmospheres

It is always a challenging feat to perform operations in a potentially dangerous environment. And even with the greatest test tools that adhere to its user’s safety, you cannot be completely complacent. Pressure calibrating can pose a challenging task when done in a potentially explosive atmosphere. Therefore, when faced with such an assignment, make sure that you have undergone proper training and are equipped with the right equipment.

A deeper understanding of “intrinsically safe”

Primarily, to conduct pressure calibration in a high-risk atmosphere, you need a tool that is deemed “intrinsically safe”. To give a simple explanation, if your tool is intrinsically safe, it means that it is designed to prevent the release of sufficient energy by either thermal or electrical means. Doing so will cause the ignition of flammable material such as gas or dust particles.

In general, intrinsically safe standards don’t just apply to one device or a certain operation, but it applies to all tools and devices that are regularly exposed to potential explosive sources. Here are some of them…

  • Electrical sparks
  • Electrical arcs
  • Flames
  • Hot surfaces
  • Static electricity
  • Electromagnetic radiation
  • Chemical reactions
  • Mechanical impact
  • Mechanical friction
  • Compression ignition
  • Acoustic energy
  • Ionizing radiation

If you are a technician or maintenance man working in industries such as mining, petrochemical, pharmaceutical, or something that exposes you to explosive gases then make sure that your devices are deemed intrinsically safe. Remember, that you are the best asset on the field, so do not take any chances of proceeding with your operation without safe tools to use.

How to pressure calibrate a transmitter in a risky environment.

Now you know all about the device’s safety, let us move on to pressure calibrating a transmitter. It is already a given that you’ll probably tread on eggshells the entire time and try not to provoke the explosive substances that are surrounding you. However, that is not all you need to worry about. The most important thing that you need to do is to perform the procedure carefully and with precision.

Here’s how you can do it according to an official Fluke source:

  1. Depressurize and isolate the transmitter. If opening the transmitter exposes voltages beyond the Intrinsic Safe (I.S.) rating use a continuous monitoring gas detector to monitor for explosive gases.
  2. Plumb the transmitter to the 1/8 inch NPT pressure port of the 718Ex. Connect the test leads per the figure above.
  3. Turn the calibrator on. Vent the calibrator and press zero to zero the pressure displayed. Close the vent control.
  4. Press the UNITS key until PSI shows in the display.
  5. With the 718Ex’s bleed valve open to the atmosphere, press the ZERO key. Close the bleed valve. Set the pressure/vacuum valve to +, for positive pressure.
  6. Use the hand pump to apply 3 psi to the transmitter. Partial pump strokes will apply small increments of pressure. Use the fine-adjust knob to get close to 3.00 psi.
  7. Press the HOLD key and record the psi and mA readings. Press the HOLD key to resume reading.
  8. Calculate and record the error, using: Error = ([(i-4)/16] – [(P-3)/12]) * 100 where Error is in % of span, i is your measured current in mA, and P is your measured pressure in psi.
  9. Repeat steps 5 through 7 at mid-range, around 9 psi, to check linearity at mid-span.
  10. Repeat steps 5 through 7, now at 15 psi, for a check at 100 % of span.
Photo Source: https://us.flukecal.com/literature/articles-and-education/pressure-calibration/application-notes/calibrating-pressure-transm

Purchase from an authentic source!

Hey, you made it to the bottom! Are you currently looking for the best-performing test tools in the market to run daily maintenance checks on your machines? You are in luck cause Presidium PH is an authorized distributor of Fluke test tools in the Philippines.

If you want to know more about Fluke tools and their functions, visit our website for more info! This is a one-stop shop for the best test tools within Metro Manila.

Visit our website https://presidium.ph/shop/?wlfilter=1&product_cat=fluke-calibration to know more about our fluke calibration products.

Read more

Quick Run Through of Power Quality Symptoms and What’s Causing Them

Are you experiencing power-related symptoms with your machines, panels, or electrical wiring? Although it is a given fact that Fluke tools can undoubtedly solve these issues with a simple click of buttons, it is also a good practice for electricians and caretakers to know what is causing them. Remember that action prevention is always better than relying on tools alone. Therefore, knowing the causes of power quality symptoms also takes a substantial chunk regarding understanding the process for it to go as smoothly as possible.

Importance of power quality

When we touch upon the topic of power quality, it relates to things that consume power. And for electronics and machines to function properly, they need a good consistent flow of voltage. Power quality is important because, in the modern world that we live in today, electricity and power are widely used and saturated in most businesses and households. Imagine what it would be like when your power is tripping or acting up. This will cause unwanted downtimes for businesses, and it will also cause pricey maintenance assistance.

Remember the famous quote “health is wealth”? It does not just apply to people’s health, but it also applies to electrical aspects as well. Keeping your power lines in their peak condition and maintaining their optimum power quality will be beneficial for your business and households overall.

Causes of poor power quality

If you are experiencing these issues with your lights or electricity in general, then it might be high time for you to contact someone to look at your powerlines. Take note that the causes of poor power quality can happen to any electrically powered thing when it is starting to age. According to ICAR, here are some of the possible causes of poor power quality…

Probable causes:

  • Power failures (Release switches, fuses blowing).
  • Breakdowns or malfunctions of machines.
  • Overheating of machines (transformers, motors, etc.) leads to reduced useful life.
  • Damage to sensitive equipment (computers, production line control systems, etc.).
  • Electronic communication interference.
  • Increased distribution system losses.
  • The need to oversize systems to cope with additional electric stress results in higher installation and operational costs.
  • Luminosity flickering

A quick run-through of power quality symptoms.

Let us not make things complicated. There are a lot of possible causes of why your electric machines or your panels are malfunctioning. Here, we are going to quickly run-down the most common ones that you will experience. We will state the issues, their symptoms, and their possible potential causes.

Dips and Sags

One of the most common occurrences of electrical or power-related issues is “dips and sags”. You will know it when it happens when you start experiencing dimming lights, computer lockups, equipment shutdown, systems shut down, and unexplained shutdowns in general.

One of the main causes of dips and sags are extreme weather conditions that can really shake up electrical lines and cable posts. In line with this, starting large loads, especially large inductive can also be a reason for electrical dips and sags.

Electrical Swells

You might want to watch out for electrical swells. You will know when your power lines are experiencing this when your power supplies are failing. Also, overvoltage shutdowns and alarms on variable frequency drives can be in the works when electrical swells take place. The potential causes for this are capacitor bank switching, sudden load decrease, or faulty single phase of three-phase systems.

Transients

One of the most dangerous causes of power quality symptom transient usually triggers arcing effects and flashovers that are very harmful to maintenance men and women when they are exposed to them. In line with this, it also triggers damaged insulations, computer lockups, and failed electronics.

To prevent this occurrence, try and watch out for these things that are causing them.

  • Lightning strikes
  • Switching of capacitors
  • Reenergizing systems after a power failure
  • Sudden stoppage of large equipment
  • Dirty or worn contactors

Harmonics

Its symptoms consist of overheated electrical functions. To prevent this, watch out for the overheating of your conductors, transformers, and inductive motors. These elements can cause damage to your harmonics. Also, like other causes of poor power quality, you may also experience unexplained shutdowns of your electronic equipment. But let us not forget about its potential causes.

Causes of harmonics:

  • Nonlinear loads such as switching power supplies
  • Converter sections of uninterruptible power supply (UPS), VFDs, and battery chargers
  • Welders
  • Arc furnaces

Power Interruptions

This is one of the most common faults that people experience when heavy rains or storms occur. technically, this entails a total power shutdown of appliances, lights, or anything that is powered by electricity. In simple terms, it is a momentary loss of utility power. Power interruptions may seem like a simple and common thing, but it is also a cause of unwanted downtimes that can affect a business’s productivity. Not to mention, some downtimes can be costly to some industries as well.

Resolve these failures using Fluke Tools!

Hey, you made it to the bottom! Are you currently looking for the best-performing test tools in the market to run daily maintenance checks on your machines? You are in luck cause Presidium PH is an authorized distributor of Fluke test tools in the Philippines. Prevent these faults from penetrating your machine by using the best test tools there are!

If you want to know more about Fluke tools and their functions, visit our website for more info! This is a one-stop-shop for the best test tools within Metro Manila.

Read more

Electric Safety: 5 Preventive Practices to Keep You From Harm During Operations

Method with caution is the rule of thumb of most people who are working with electricity. Live wires or dead wires, one should never be complacent when testing or doing maintenance checks. Nevertheless, there will always be a certain pressure for workers to get the job done no matter what happens. And when certain pressures are breathing down your neck, you might have the tendency to miss a few electric safety steps.

However, missing a few safety steps shouldn’t be something to feel bad about. Actually, even professionals can sometimes make those mistakes. The bigger picture is your safety when you’re around electrical wires. So here are things that you should prevent doing when you’re around them.

Here are preventive practices you should keep in mind when testing electricity…

These are just quick reminders for people who are working closely with live wires (or dead ones) daily. Ignorance of simple things can sometimes be the main cause of a project’s destruction or an immediate trip to the emergency room. Therefore, it’s always a smart move to be very careful and attentive when doing electric testing. Here are some of the common mistakes you should watch out for.

Electric Safety: Working on live circuits

You should limit your exposure to live wires as much as possible. One of Fluke’s best features is its ability to take measurements from afar making its user well protected and away from danger. The best course of action is to de-energize the live wire or switch off the main power source. But then again, why should you vie away from electrical circuits when you have your full protective gear on? It’s because your PPE can only protect you to a certain extent. So, if you’re working with live circuits, better have full insulted tools together with your PPE.

Electric Safety: Refusing to upgrade test tools

You have to upgrade your test tools. We’re not saying you should purchase every time a new one comes out, but if the said tools are going to help you in doing the job better, then, why not right? Good tools are an investment especially if you’re planning on having a career in the electrical department.

Your tool might be working perfectly fine right now but can you still say the same 10 years after? No matter how good your test tool is, opting to purchase a more advanced tool that can keep you safer is always preferred. These advanced tools may be worth the investment than the old ones you have right now.

Electric Safety: Holding test tools with both hands

Actually, try not holding anything at all if it’s possible for you to do so. The goal of every operation is for you to limit your contact to any live wires or any tool that can bring you harm. So, if you must hold your tools when testing electricity, always do it with one hand. Doing so will lessen your exposure to harm if ever there are any unfavorable occurrences.

Nevertheless, the best option for you is to go hands-free (if the operation or the project itself allows it). You can try hanging your device somewhere while testing electricity. Some Fluke tools actually have this feature so that any worker can feel safer doing a ‘hands-free’ job.

Electric Safety: Replacing fuses with cheaper ones.

The fuses that you bought together with your digital multimeter are tested in regards to the CAT safety standards. Moreover, the one that is originally installed in your device can surely withstand any overload or faulty electric wiring. On the other hand, buying from another source might not level up to the original one. It’s always to be better off safe than sorry, so when replacing your digital multimeter’s fuses, buying from an original source is always the ideal choice.

Electric Safety: Don’t neglect your test leads.

One of the most important accessories you can have for your digital multimeters is your test leads. Remember, test leads don’t come in one form. There are a lot of other types that are better suited for the project you are working on. A word of advice, for further safety measures, try looking (or consider purchasing) test leads with finger guards, non-slip surfaces, shrouded input connectors, and those with double insulation.

Purchase from an authentic source!

Hey, you made it to the bottom! Are you currently looking for the best-performing test tools in the market to run daily maintenance checks on your machines? You’re in luck cause Presidium PH is an authorized distributor of Fluke test tools in the Philippines.

If you want to know more about Fluke tools and their functions, visit our website for more info! This is a one-stop-shop for the best test tools within Metro Manila.

Read more

What is Nonstandard Fault Diagnosis and How Do We Deal With It?

What is it?

Wondering what a non-standard fault diagnosis is? If you are not a maintenance person, this may sound alien to you, but for maintenance people out there, it may be a piece of common knowledge. To give you a brief context, this kind of fault can easily be prevented by the thorough configuration and setup of your Fluke tool. Yes, that’s right, nonstandard fault diagnosis can stem from the assembly of your Fluke tool itself.

So before you go blaming the machine, see if you’ve got everything inputted in your Fluke device. Then again, aside from the setup itself, there are also some other underlying issues on why your Fluke tool is tagging it as a nonstandard fault diagnosis.

The three main causes of nonstandard fault diagnosis

With the use of Fluke tools, no doubt you can spot issues within your machines in a jiffy! For this one, we strongly recommend the use of the Fluke 810. Vibration Testers are one of the most recommended tools to spot machine faults. Not only is it highly effective in the field, but it can give you accurate diagnoses and solutions.

One of the most wonderful functions of this Fluke tool is its ability to detect, locate, and assess the severity of issues within equipment and rotating parts. May it be bearing condition, misalignment, imbalance, or looseness, one thing is for sure, it can be seen and resolved with the use of the Fluke 810 Vibration tester. In line with this, it can also tell nonstandard faults. Here are the three main causes…

1. Incorrect or incomplete setup. For this to work, you need to accurately input all the data of your machine while setting up the Fluke 810 Vibration Tester. One of the common faults of why you’re getting a nonstandard fault diagnosis is you’ve not put all the information of the machine you’re testing. So take note, it’s important for you to process everything while setting up your vibration tester.

2. Incorrect or insufficient data collection. Again, incorrect inputting of data plays a big hand in this. Technically, this happens when the minimum data collection requirements were not met. Moreover, the running speed of the machine (which was not accurately entered) can also be the cause of this.

3. Vibration condition other than one of the four standard faults. Yes, you can still have a nonstandard fault diagnosis other than detecting the four standard faults. Ideally, The Fluke 810 recognizes these readings. However, we will get to that in a little bit.

How to deal with nonstandard fault diagnosis

If you find yourself having a nonstandard fault diagnosis whilst doing a normal testing procedure, the next thing you should do is to have another test. See if the result stays the same or if it changed. If the results change, then it might just be the effects of having data collection errors or vibration events. However, if you do get another nonstandard fault diagnosis, then it might be high time to undergo another process. Here is how you will do it…

  • You might have to tinker with your Fluke tool. Specifically check if information about the driver, transmission, and driven component has been entered (or other relevant data). In addition, also take note of the component types. Was the AC motor accurately described like the DC? How about the screw compressor? It might have been entered as a piston compressor.

Technically, these are the things you have to double-check once you have a second reading of a nonstandard fault diagnosis.

  • Data quality and quantity are enough to achieve an accurate diagnosis. Again, complete information is necessary when you’re working with the Fluke 810 Vibration Tester. A good practice (or something to keep in mind) is never to set up or test partial drivetrains.
  • Double-check if the vibration data was collected. See if the location and orientation of the components are the same as the ones on the setup diagram in the Fluke 810.

Consider these other fault conditions…

In such a time that you’ve inputted all information but are still getting the same nonstandard fault diagnosis result, then you might consider these other faults that are not brought up by your Fluke 810 device setup. According to an official Fluke source, these are the probable causes…

Electrical

Electrical switching fault in a variable frequency drive

Problems with Motor components (stator, winding, commutator, brush)

Motor lamination looseness

Motor air gap problem

Line phase voltage imbalance

Non-bearing mechanical element wear or defect

Pump component (vane, timing gear, impeller, piston, idler shaft, rotor) wear or clearance problemsMotor cooling fan blade damage

Gearbox input shaft pinion problem

First gear mesh problem or wear

Fan wheel wobble

Fan dirt buildup or blade clearance problem

Sheave problems

Drive belt irregularity

Coupling wear

Compressor components (rotor thread, piston/valve, impeller, lobe) wear

Flow related

Pump cavitation or air ingestion

Fan airflow disturbance

Compressor gas pulsation Structural

Structural vibration or resonance

Motor or pump mounting flexibility

Motor foundation flexibility or resonance

Foundation weakness or resonance

Foundation vibration

Fan mounting transverse flexibility

Other

Overloaded accelerometer

Oil whirl

Oil whip 

Resolve these failures using Fluke Tools!

Hey, you made it to the bottom! Are you currently looking for the best-performing test tools in the market to run daily maintenance checks on your rotating machines? You’re in luck cause Presidium PH is an authorized distributor of Fluke test tools in the Philippines. Prevent these faults from penetrating your rotating machine by using the best test tools there are!

If you want to know more about Fluke tools and their functions, visit our website for more info! This is a one-stop shop for the best test tools within Metro Manila.

Read more

Fluorescent Light Tester: 5 Essential Light Tests Under 30 Seconds

Light is an essential part of life. It is used in houses, commercial areas, schools, and other places that we frequent as well. The sheer importance of it in our day-to-day activities makes it a point that it is also important to make sure they are functioning well. This makes the Fluke Fluorescent Light Tester a definite must-have for commercial maintenance people.

This test tool can perform five essential light tests in under 30 seconds! Come to think of it, if you are working in a big establishment with a lot of fluorescent lights, the Fluke Fluorescent Light Tester might just be the most ideal tool for you.

What are fluorescent lights?

Fluorescent light is one of the utmost versatile lightings that is used in commercial areas such as shopping malls, schools, grocery shops, offices, convenience stores, etc. You can find it anywhere and everywhere you go. As to why it is popularly saturated, it is a type of light that is known to be energy efficient. Not only that, but it has a lower price than LED lights.

What does a Fluorescent Light Tester Do?

If you’re working in an industrial department with a lot of fluorescent light, then you might want to consider having a Fluke Fluorescent Light Tester. One of the main functions of this tool is that it saves time and energy for the people involved. Imagine having to check fluorescent lights one by one without an advanced test device. You will be burning time, energy, and money by doing so.

The greatest thing about Fluke Flourescent Light Testers? It will enable you to do five essential light tests in under thirty seconds. What seems like what needs to be done in at least an hour or 30 mins for each light is reduced to thirty seconds. Amazing right? Let us take a closer look. Here are the specifications of the Fluke Fluorescent Light Tester:

General Specifications
Lamp test max output3000 V peak
Ballast test20 kHz
Ballast type discriminator≤3m (10 feet) distance
Pin continuity test< 1 kΩ
NCV (VoltAlert™)85 to 400 V AC45 a 67 Hz≤10 cm (4 in) distance
Environmental Specifications
TemperatureOperating: -10 °C to +50 °C (14 °F to +122 °F)Storage: -40 °C to +60 °C (-40 °F to +140 °F)
Relative humidity85% maximum
Safety Specifications
Safety ratingIEC 61010-1, pollution degree 2
Mechanical and General Specifications
Size21.5 cm x 3.0 cm x 6.5 cm (8.5 x 1.2 x 2.6 in)
Weight0.37 kg (0.80 lb.)
Battery type4 x AA alkaline IEC LR6
Battery life40 hours
Auto power off20 minutes after non-use
Low battery indicatorPower button light blinks when power is low (typically 85% of capacity depleted)
Operating altitude<2000 m
Electromagnetic environmentEN 61326-1: Portable
Resistance to impact2-meter drop
Warranty3 years

Five essential light testing.

How amazing Fluke tools are? They made a tool that can do all five light tests in one go. Naturally, a device that can do five tests under thirty seconds each is already applaud-worthy. This kind of device is the ultimate showstopper for maintenance men who work for light bulbs. For sure, they will get the job done in no time.

What’s more, a device that can do all in one can ultimately save space in tool bags and can easily be carried when going up and down the stairs. Why carry 3-4 test tools when you can carry one tool that can do more, right?

Here are the five essential light testing that this tool can provide:

  • Lamp test: This allows you to do testing without removing the tube from the ballast. The tester sends a pulse of energy that lights up the tube if there is gas in it. The Fluke Fluorescent tester is compatible with T5, T8, and T12 fluorescent tubes.
  • Ballast test: Effortlessly determine whether the ballast is working.
  • Non-contact voltage test: Quickchecks for the presence of voltage without touching the source.
  • Pin continuity test: Tests whether filaments in the tube have continuity.
  • Ballast-type discriminator: Another one of the best features that this Fluke tool has is that you no longer need to take apart fixtures apart or even climb a ladder. You can easily determine if the ballast is electronic or magnetic from afar. Simply, aim the tester at the ballast from where you’re standing, and it can identify which type you have. This can identify:
  • Old-style
  • Power-hungry magnetic ballasts
  • Maintenance need
  • Replacements

Other useful capabilities:

This Fluke device is built to last so expect durability and at the same time ease of use. Its yellow hard case cover is attractive but easy to maintain and clean. Moreover, as all Fluke tools are known, it features a rugged, extendable all-metal test rod that can be easily replaced should the need arise.

Get your Fluke tool from a trusted source!

Now you are ready to perform tests in under 30 seconds with the use of this prestigious test tool! So why not get it from a trusted distributor in the Philippines? Presidium PH is an authorized distributor of Fluke test tools in Metro Manila. So, if you want to know more about Fuke tools and their functions, visit our website for more info! This is a one-stop-shop for the best test tools in the market!

Read more