What Is a Three-Phase Power Quality Logger?

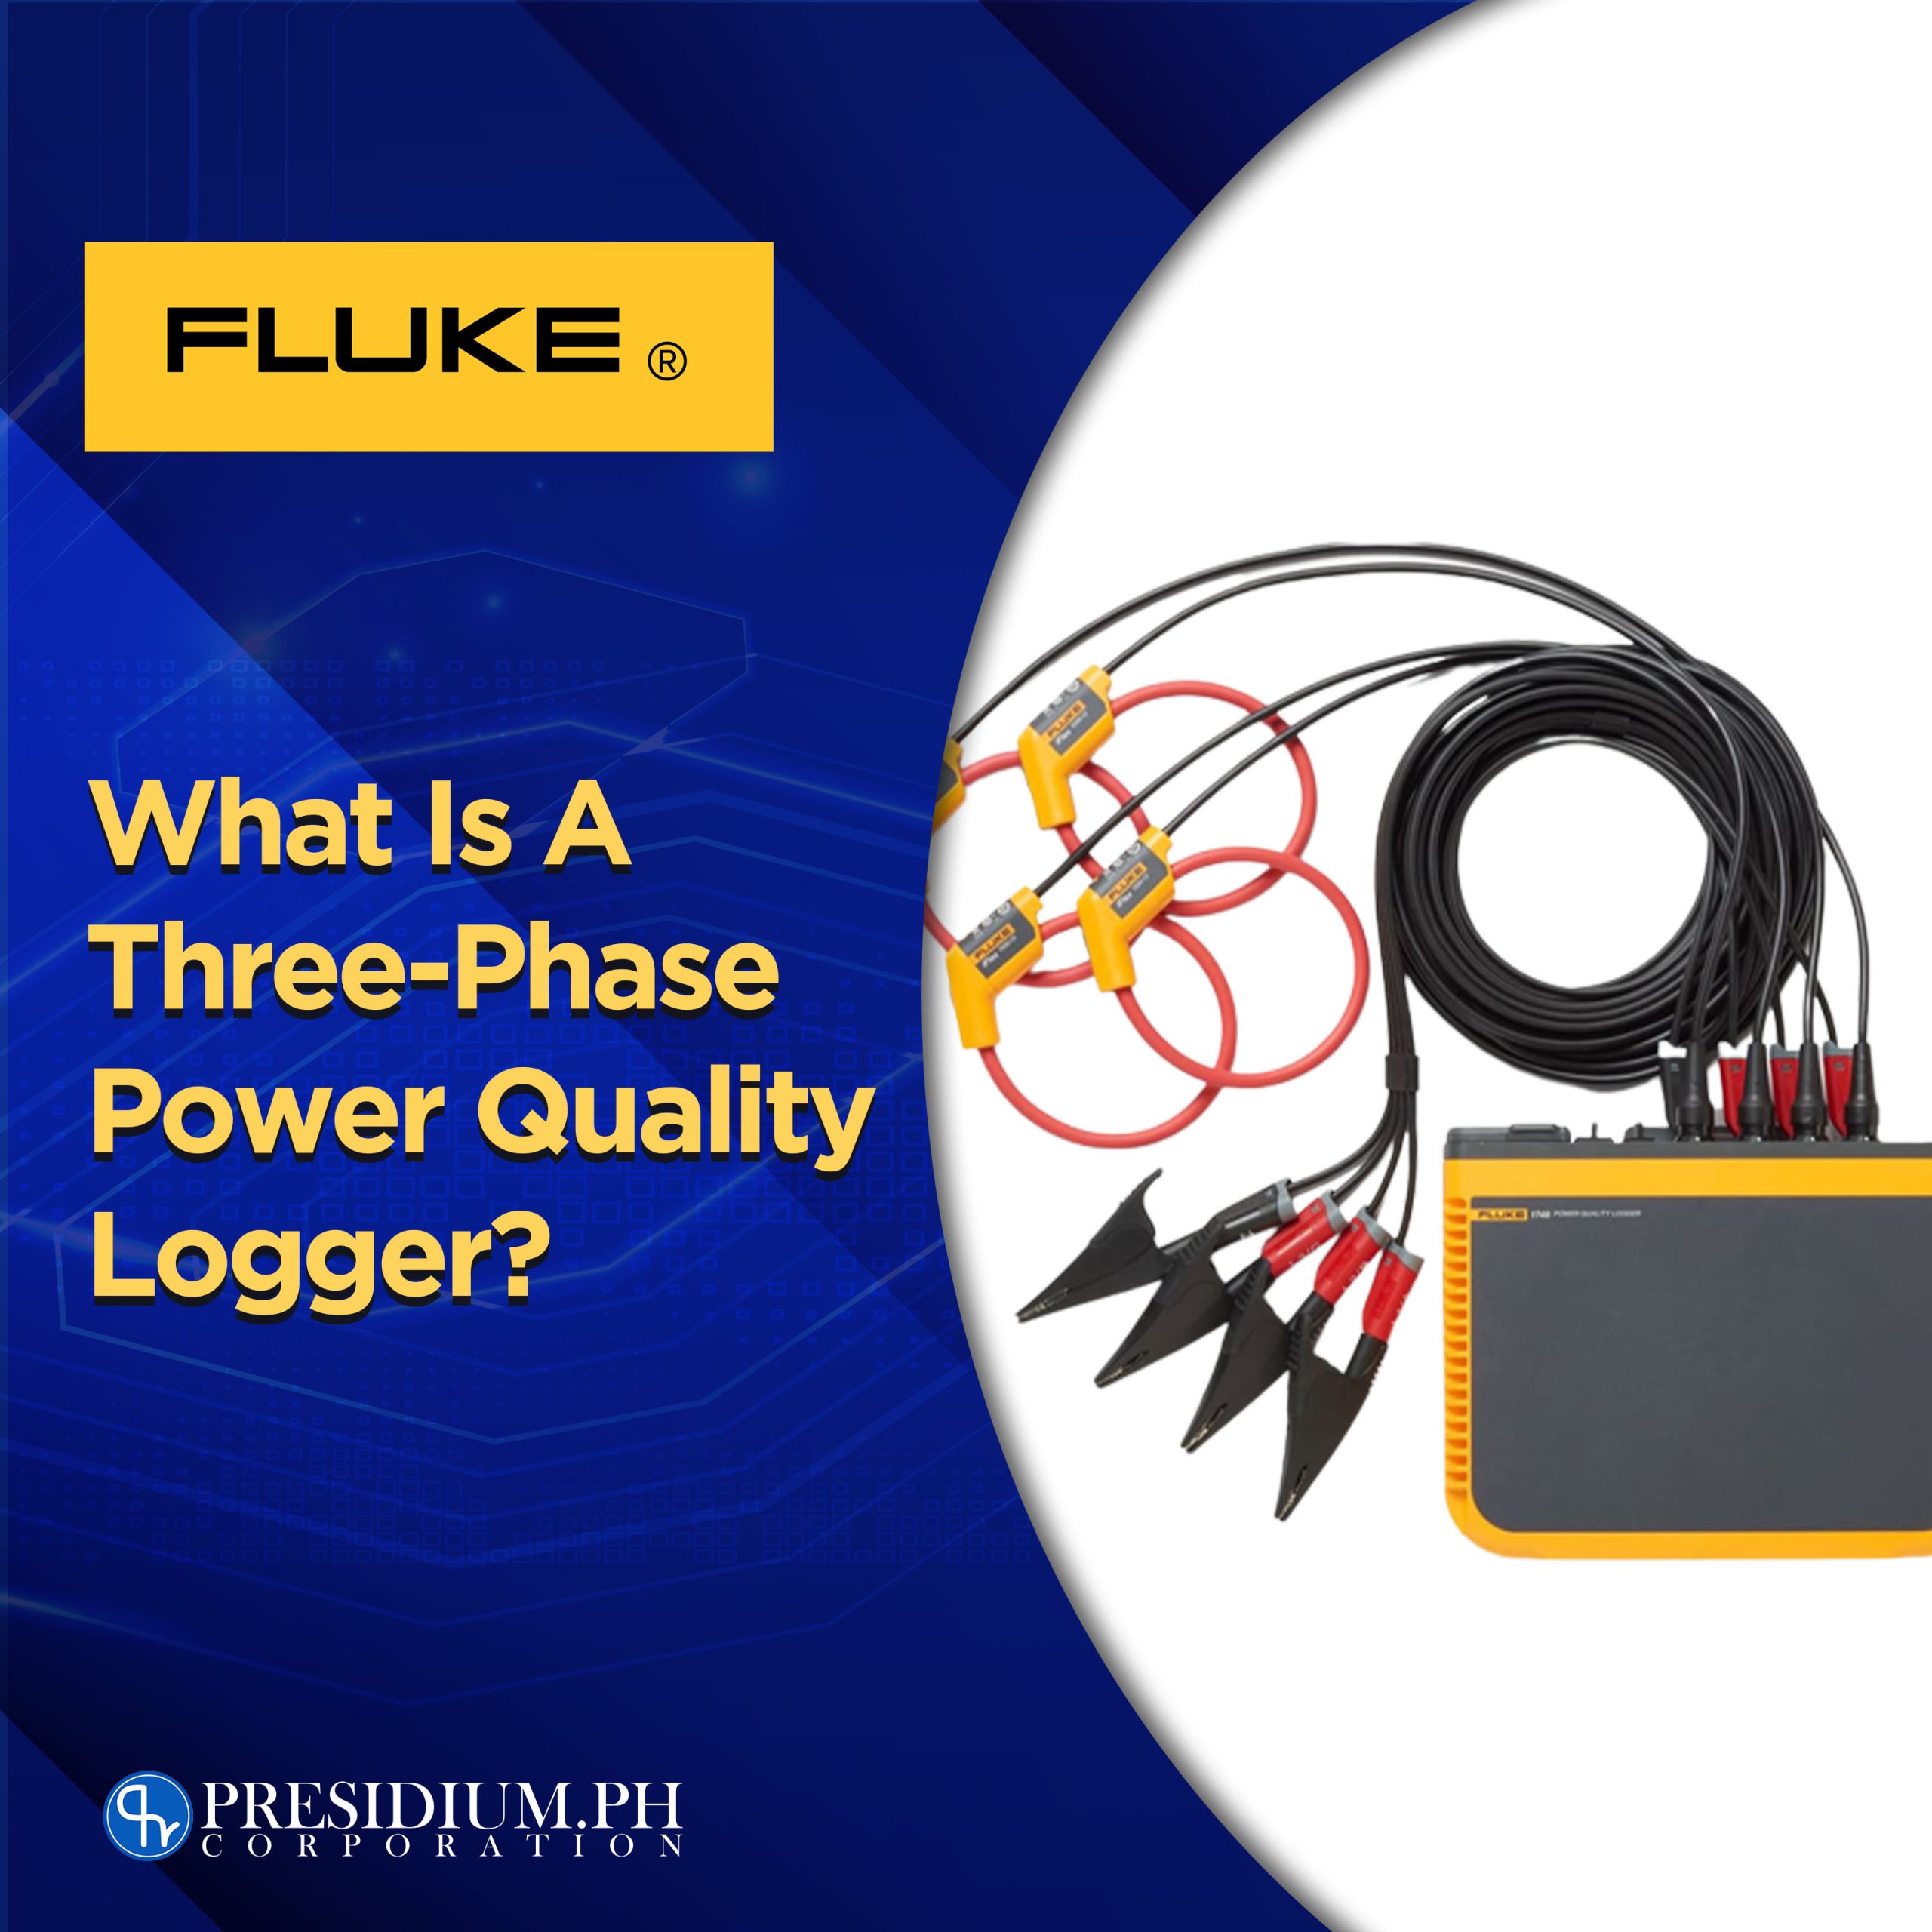
Reliable, quick, and easy, the Fluke three-phase quality logger can perform all the needed studies to ensure the logging of power quality in every machine is accurate and reliable. Like any Fluke tool, the power logger can perform under pressure, is accurate (considering that you do calibration), and can withstand any rough environments. Ideally, this three-phase power quality logger can be used in three different areas of testing.

  • Electrical load studies
  • Energy consumption testing
  • General power quality logging
  • They measure harmonics
  • Electrical power parameters
  • Capturing of voltage events

However, that’s only a gist of what they do. Here, we’ll be able to know more about how a three-phase quality logger can contribute to your electrical machines.

They come with a lot of phases.

They are generally known as power quality loggers, but they also come in the name of “energy loggers”. So don’t get confused when you hear both terms. Anyhow, you’re probably wondering how these things have “a lot of phases”. However, what we truly mean by this is that it comes with variations. Moreover, if you’re spotting a power quality logger, you can find that there is a one-phase logger, two-phase, and of course, a three-phase power logger. So, it’s probably wise for you to assess your machine and your test projects first before getting one.

Its notable applications

Power quality loggers can be applied to different forms of testing. An authorized Fluke source pointed out its most beneficial functions when it comes to power quality logging. Here are some of them according to an official Fluke source.

  • Load studies – Verify electrical system capacity before adding loads.
  • Energy assessments – Quantify energy consumption before, and after improvements, to justify energy-saving devices.
  • Harmonics measurements – Uncover harmonic issues that can damage or disrupt critical equipment.
  • Voltage event capture – Monitor for dips and swells that cause spurious resets or nuisance circuit breaker tripping.

What does a three-phase quality logger do?

The thing about electrical power usage is that it is continuously and constantly changing. We may find wasted energy one day and wonder where it all came from. And this is the specialty of three-phase quality loggers. Ideally, the main priority of quality loggers is not only to detect the root cause of the problem but is also effective in doing all kinds of tests.

On the other hand, they can also do electrical load studies, energy consumption testing, and general power logging. Furthermore, with the use of Fluke’s three-phase power quality saving, you’ll be able to find out where and when you are consuming energy. A feature that is beneficial for you since you can know where you can adjust certain electrical practices, and this device gives you exactly that. As a result, you can now create credible power-saving strategies to avoid waste.

Finally, when you’re continuously logging energy usage, the three-phase quality logger can effectively assist you in quickly and easily identifying waste faults. Therefore, identifying saving opportunities can be all the easier for you.

The Fluke energy logger commands ease of use and quality performance.

A sweetener for every Fluke device is that it promises easy usability. Even a first-timer can be able to navigate his/her way through a Fluke device and it’s one of its winning qualities. But don’t be mistaken, this tool is more hardcore than you think. Here are more of them.

  • Record power and associated parameters for up to 45 days.
  • Monitor maximum power demand over user-defined averaging periods.
  • Prove the benefit of efficiency improvements with energy consumption tests.
  • Measure harmonic distortion caused by electronic loads.
  • Improve reliability by capturing voltage dips and swells from load switching.

Resolve these failures using Fluke Tools!

Hey, you made it to the bottom! Are you currently looking for the best-performing test tools in the market to run daily maintenance checks on your machines? You’re in luck cause Presidium PH is an authorized distributor of Fluke test tools in the Philippines. Prevent these faults from penetrating your machine by using the best test tools there are!

If you want to know more about Fluke tools and their functions, visit our website for more info! This is a one-stop-shop for the best test tools within Metro Manila.

Shop now: https://presidium.ph/shop/?wlfilter=1&product_cat=fluke-power-quality-analyzers

Read more

How Do We Test For Continuity Using Digital Multimeters?

As far as testing is concerned, testing for continuity also holds a big deal to know if something is wrong with your electrical circuit. It takes a significant stand in testing since it will allow you to know if there’s something wrong with the current flow. Technically, it checks if the current in the circuit is still continuous.

Think of it this way, if a straw is bent, little liquid can pass through it and if in such circumstances that it is punctured, then all liquids will likely seep through that hole. It is the same thing with electrical circuits. Devices will not function properly if the current can’t flow freely.

Watch out for these two things…

There are two things that you need to watch out for when you test for continuity. Mainly, these are the resistance between the two points measured. Ideally, low resistance means that there is electrical continuity. Meanwhile, high resistance means that the circuit is open and therefore, the continuity is lacking.

The best device to measure is a digital multimeter.

Fluke Digital Multimeters are one of the most versatile tools that a maintenance person can have. Not only does it boast advanced functions, but its efficiency is well-spoken. This infamous tool has all the qualities that Fluke tools possess, but the most notable one will truly be keeping workers safe from possible electrical hazards that are inevitable to happen.

These are the most preferred tools for testing continuity since digital multimeters can be used to test switches, fuses, electrical connections, conductors, and other components. Its flexibility to test multiple assets in one makes them the most suitable tool for the job.

Benefits of Continuity Testing

According to Power Assembles, in order for electricity to flow, things need to stay connected. Ideally, there can’t be any breaks in the pathway or there won’t be a continuous flow of electricity. And this is where the need for continuity testing comes in. One of the huge benefits that continuity testing holds is its ability to determine faults within electrical circuits that can be harmful to man in the long run. But that’s not all, take a look at the other benefits that they hold…

Other benefits of continuity testing:

  • Continuity testing can let you determine if a circuit is open, closed, or shorted.
  • It lets you know if a fuse is good or blown.
  • Makes sure a switch is operating properly.
  • Verifies wires operating on the same circuit.
  • Validates whether wire and cable assemblies are functional.
  • Helps test the resistance of conductors.

Here’s a quick guide on how you can do continuity testing using digital multimeters.

Let’s go into detail on how you can safely perform a continuity test using your digital multimeter. And no, it’s not as complicated as you may think. It’s actually fairly easy to understand, it only takes a couple of steps for you to give this a shot. According to an official Fluke source, here’s how you can do it…

  1. First, insert the black test lead into the COM jack.
  1. Then insert the red lead into the VΩ jack. When finished, remove the leads in reverse order: red first, then black.
  1. With the circuit de-energized, connect the test leads across the component being tested. The position of the test leads is arbitrary. Note that the component may need to be isolated from other components in the circuit.
  1. The digital multimeter (DMM) beeps if a complete path (continuity) is detected. If the circuit is open (the switch is in the OFF position), the DMM will not beep.
  1. When finished, turn the multimeter OFF to preserve battery life.

Get your digital multimeters through an authentic source!

Hey, you made it to the bottom! Are you currently looking for the best-performing test tools in the market to run daily maintenance checks on your machines? You’re in luck cause Presidium PH is an authorized distributor of Fluke test tools in the Philippines. Prevent these faults from penetrating your machine by using the best test tools there are!

If you want to know more about Fluke tools and their functions, visit our website for more info! This is a one-stop shop for the best test tools within Metro Manila.

Shop Now: https://presidium.ph/?s=clamp+meter+

Read more

Electrical Measurement Safety: How to Test Your Test Leads?

Test leads are a common sight to maintenance and women who are constantly working in electrical testing. It is also a known tool for electrical measurement safety that is often seen connected to digital multimeters. What most users do not know is that it is a Fluke accessory that is ideal to use in every operation especially if you’re using a digital multimeter (or a Fluke device that can be connected to test leads).

Importance of test leads.

Some people might think that it’s okay to measure without leads. But having to do so is very unwise. Never take your leads for granted. Even with the use of the infamous Fluke tools, you will still not be completely bulletproof when a hazardous occurrence takes place.

Test Leads will act as the first line of defense when you encounter high currents. Given the electrical measurement safety that it provides users, it makes it an essential part of test tools, especially for digital multimeters.

Make sure that your test leads are safe to use.

It is partly common knowledge that test leads are a vital part of every digital multimeter. With this said, you need to make sure that they are always in good working condition. Keep in mind that Fluke test tools are always going to be something more when they are paired with Fluke accessories like test leads. But beware, test leads may seem like a durable accessory but they are also prone to over usage and wear, making them decrease in performance.

Therefore, it is particularly important for you to inspect them before and after usage. A malfunctioning test lead can make matters worse for you than you think. In the maintenance department where accurate reading is necessary, a worn test lead may just get you into trouble. You see, test leads are prone to giving inaccurate readings when they are (1) under-rated, (2) worn, and (3) poorly manufactured.

Prevent the possible hazards.

Although test leads are naturally safe to use, there is an excessively significant difference once it starts to get old. Ideally, all test tools and accessories need a keen eye as well as all sorts of maintenance checks to keep them in good working condition. And this does not leave out test leads. If there are no maintenance checks for these test tools, daily maintenance operations might take a turn for the worst.

Remember that test leads are our first line of defense when working with high currents? Well, at worst and your test leads are in real bad shape to perform any extremely sensitive maintenance checks, then your test leads may provoke electrocution and shock hazards for the user. Therefore, it is very much preferred to also check your test leads to prevent the possible hazards that they may pose.

Do not forget to evaluate the test leads!

You read it right, your test leads also need to evaluate to ensure that they are still fit to do readings accurately and safely. It is simple to apply these in your day-to-day tool maintenance check. Trust that caring for your test leads early on can reap rewards in terms of future use. This will ensure accurate readings in every electrical measurement operation. Here’s how you’ll do it according to an official Fluke source!

Assessing the test leads:

  • Make sure to evaluate the leads while it is plugged into your DMM (digital multimeter).
  • Assess your leads using a simple OHMs measurement to ensure reliability.
  • You may isolate a problem to one lead or the other by assessing them separately.
  • If you are doing separate testing, simply connect one lead at a time between the ohms and common input.
Photo Source: Newark

Additional Tips: Conduct an inspection for your test leads.

Some of the underlying issues of test leads can be seen in plain sight. A visual inspection might just do it. It is simple, doable, and will not require much of your time. That is if you know what you are looking for and where to look for faults.

When you are conducting a visual inspection, you should (1) check the insulation. Make sure that it is not cracked or nicked. This is because with age the insulation material—whether PVC or

silicone—can become dried out, brittle, and susceptible to cracking. (2) Be sure that there are no gaps or cracks located at the junction between the insulated wire and the banana-like plugs at each end.

Resolve these failures using Fluke Tools!

Hey, you made it to the bottom! Are you currently looking for the best-performing test tools in the market to run daily maintenance checks on your machines? You are in luck cause Presidium PH is an authorized distributor of Fluke test tools in the Philippines. Prevent these faults from penetrating your machine by using the best test tools there are!

If you want to know more about Fluke tools and their functions, visit our website for more info! This is a one-stop shop for the best test tools within Metro Manila.

Shop now: https://presidium.ph/?s=test+leads+

Read more

How Often Should You Calibrate?

Calibrate your Fluke tools to keep them in pristine shape. For test tools, calibration is one of the utmost crucial steps for you to maintain their performance level and their accuracy in reading and testing. Many may think that calibration happens only once, but you need to do it based on the exposure to stress that your Fluke tool experiences. But the question remains, how often should we calibrate fluke tools?

There is additional to it than simply ensuring that the tools are dependable and safe. Take note that there are multiple calibration tools and not just one to ensure that all products and Fluke equipment are accounted for. There is also a thing called calibration intervals which also stands on important grounds when you are planning to do this on a regular basis, but we’ll get to that in a bit.

Importance of calibration

Fluke builds to last. The durability of products is one aspect that Fluke considers when building test tools. Therefore, Fluke is known for its rugged features and its ability to withstand harsh elements. Moreover, it can tolerate strenuous activities and pressure since these test tools are built to keep workers safe and confident working in risky environments. And that is what makes them so sought-after. Initially, when Fluke builds a product, one of the most important things we think about is how our instruments perform over time. And this is where calibration comes in.

Calibration ensures that the device is still well-equipped to manage activities that are in a high-pressure environment.  Moreover, performing calibration can reap rewards overall since you will be able to determine errors, faults, and the limits of your test tool.

What are Calibration Intervals?

Be aware of calibration intervals. As the name itself suggests, calibration intervals are the time in between calibration tests. It is the period that the test tools need before going back for a recalibration session. There is no hard rule for calibration but there is a couple of things you need to remember to determine whether your Fluke tools need one.

How often do you need to calibrate?

The utmost accurate calibration is twenty minutes intervals! We know that is a close call but don’t worry, this doesn’t mean that you need to calibrate every twenty minutes. A one-year calibration is preferred. But that is not only the one specific timeline that you must keep track of. If your Fluke tool is frequently in use and is mostly exposed to harsh environments, you might need to calibrate more often. Here is a quick guide to it!

Calibrate through manufacturer recommendation.

These are calibration instructions based on the manual itself. You can find your manuals tucked in the box of your Fluke tool. Every box has a warranty inside, if it doesn’t have one, then you better have a chat with your supplier. Those aren’t official Fluke products.

Also, keep in mind that the calibration interval may be different for each tool depending on the gravity of its usage.

Calibrate before undergoing a major critical measuring project.

It is preferred for you to calibrate your Fluke device accordingly before an extremely sensitive operation. Let us say you are about to do testing that requires accurate results. To achieve this, you need to prep your Fluke tool through calibration. Keep in mind that the older your Fluke tool is, the more it needs calibration to ensure that it is still at the tip of its performance.

Take note that operating on an extremely sensitive project may require you to act based on your finding. This fact makes it even more important for you to calibrate accordingly.

Calibrate after a major critical measuring project.

Calibrating before the project is just as important as calibrating your Fluke device after. In some industries that rely on accurate data. It is actually a required process for them to also calibrate after the testing. This is done because it ensures that the reference used can either show an intolerant condition before, during, or after the measurement project.

Calibrate monthly, quarterly, or semi-annually

As we’ve stated before, calibration is truly a recommended step for every Fluke test tool. The shorter the time span of your calibration, the better. This will ensure that your tools are in good reading condition. Plus, this will prevent you from receiving questionable readings during your operations.

So really, calibrate your Fluke tool whenever you can. Make it monthly, quarterly, annually, semi-annually, etc. Just always remember to calibrate your tool to keep them at their peak performance during every operation. But of course, the decision still stands with the user. You can either opt for shorter cycles or longer cycles depending on the results.

Calibrate through an authentic source!

Presidium PH is an authorized distributor of Fluke test tools in the Philippines. Rest assured that all tools have gone through calibration and proper tests. Prevent faults from penetrating your projects that might cause bad downtimes by using the best test tools there are!

If you want to know more about Fluke tools and their functions, visit our website for more info! This is a one-stop shop for the best test tools within Metro Manila.

Email us at calservices@presidium.ph / info@presidium.ph

Read more